How To Paint A Matte/Gloss Accent Wall
A new apartment calls for a new accent wall, so today I’m bringing you another DIY striped wall tutorial! You can checkout my last tutorial here, where I did black and white stripes on the main wall of my bedroom. That one had everyone fooled into thinking it was wallpaper but nope—just paint, loads of blue tape, and a weekend’s worth of work.
Now, before we get into today’s tutorial, little background on how this project came about. I’m currently in the middle of the One Room Challenge and spent weeks trying to figure out what type of accent wall I wanted to create in my bedroom. No, seriously. I even dreamt about them. Finally, I was able to narrow all of my inspiration down to two favorite options.
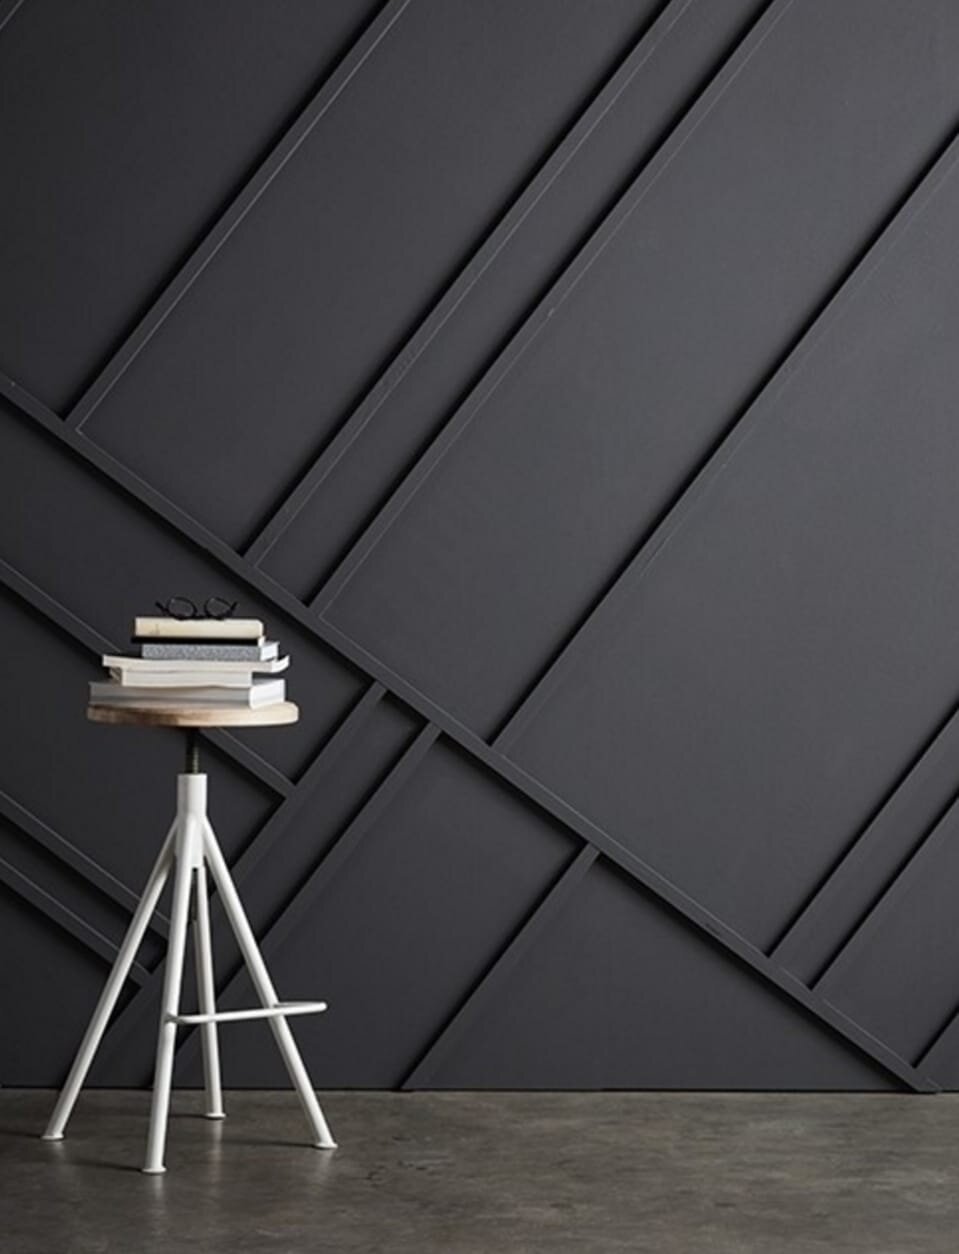
Both of these super cute walls use wood trim to create the geometric pattern, but as a renter, that really wasn’t an option for me. Instead, Ira came up with the idea to use flat and semi-gloss black paint to create the tone on tone striped look, mimicking the effect of wall trim.
Full disclosure here: at first I was adamantly against painting the stripes. Not only do I need wall trim in my life, I had done glossy stripes over flat paint before about 10 years ago for my Victoria’s Secret themed bedroom (it was trendy and wanted to be an angel, okay?) and it was one headache after another. Getting the lines straight, making sure the tape didn’t peel the base paint off, using polyurethane to create the gloss effect…just a huge DIY nightmare. The only thing that convinced me to change my mind, was how freaking awesome those stripes looked in the end.
So, I went along with Ira’s idea of painting the stripes and WOW. I am so happy I did. They look even better than I imagined they would and it actually so easy to do. Here’s how we did it…
Everything you need to know about painting a matte/Gloss Striped accent wall
Quick disclaimer: this post contains affiliate links. By using them to make a purchase, I may receive a small commission at no extra cost to you. Thank you in advance for contributing to my blog and supporting my Target addiction ;)
You’ll need:
Paint — Since I wasn’t trying to match my wall color to anything specific and just needed plain black, I bought premixed/tinted paint off the shelf. The shades weren’t exactly the same, but I think that actually helped the stripes stand out. The premixed paint is also only about half the price of custom paint, so there’s that.
Flat paint—I used ‘ColorPlace Pre Mixed Ready To Use, Interior Paint, Onyx Black, Flat Finish, 1 Gallon’. from Walmart. Only $13 for an entire gallon and I still have about half left!
Semi-gloss or gloss paint—I used ‘Glidden Premium Black Magic Semi-Gloss’ paint from Home Depot.
Painter’s Tape — I prefer Frog Tape (the green one) over 3M brand (the blue one). I find it holds better and doesn’t peel your paint off the wall afterward.
Delicate tape for the stripes.
Multi-Surface tape for the edges of the walls.
Painting Tools (roller, brush, paint cup, drop cloth, margaritas—the usual stuff)
Something to measure your lines with — I used a couple pieces leftover lumber I had from a previous project.
Now, let’s get into it!
(1) Get Inspired!
I already explained my inspiration process, so I won’t get into this much, but basically I looked at a bunch of different accent walls and geometric patterns in order to decide what I liked best and what would look good in my room. I ultimately ended up narrowing it down to two main inspiration photos and then I combined elements from each one to make my own unique pattern.
(2) Draw Your Pattern
I drew my unique pattern on grid paper to use as a guide while painting. This will help you stick to the plan you had in mind, rather than trying to come up with something on the spot.
If you’re extra like me, you can also create the pattern in a photoshop rendering to see what the overall look will be with furniture and all.
(3) Prep Your Wall
Wipe off any dirt and dust from the wall before starting. After, tape around the edges of the wall and ceiling with the multi-surface tape to help keep unwanted paint transfer to a minimum.
(4) Paint The Main Color
Paint two coats on the entire wall using the flat finish paint. I let my first coat dry overnight before painting the second, but a couple hours should be plenty of time in between coats. After the second coat, I let the wall dry/cure for 3 days before doing the next step. You MUST let the wall dry for at least 48 before painting the stripes or else you risk ruining your brand new paint job with painter’s tape in the next step.
(5) Tape Off Your Stripes
Using the delicate tape, tape your pattern on the wall. I used lumber strips to help keep my spacing straight and even throughout the design, but you can use anything piece of straight material. We started by using a piece of lumber to make our original line at the angle we wanted. Hold the lumber on the wall and tape around it. When placing the tape, it’s much easier to use multiple smaller, manageable length pieces to create the lines, rather than one long piece of tape. As you tape, rub over each piece one to make sure it is completely sealed on the edges. Remove the piece of wood—this is where you’ll be painting with the glossy paint.
Use another piece of lumber to set the distance between the first line and the second, being sure to keep the same angle throughout the entire design. Line up the end of one piece of wood with the side of the first line, then use your first oiece of wood to mark where your next line will be taped. We used varying lengths and sizes of lumber to create the abstract look in our pattern, but the angles for each line were consistent. A
Have a copy of your design/pattern handy because you’ll be referencing it a lot to make sure you’re on the right track. I found it helpful to highlight the lines in my drawing as I taped them on the wall so I could see which line to do next. After you’ve taped everything, you an exacto knife to cut out the spaces where the tape intersects so that all of your stripes flow into one another.
This entire process took us about an hour and a half, so be patient! The end result is definitely worth taking your time and making sure everything is lined up straight.
Unfortunately, I forgot to take pictures as we went, but you can watch a quick time-lapse of our entire taping process!
(6) Mark Where The Glossy Paint DOESN’T Go
Use painter’s tape in another color to mark the sections of the wall where the glossy paint does not go. It’s really easy to get into painting mode and just start painting everywhere. Plus, when you’re up close to the wall, you can’t really see the overall pattern, so this will help keep you from getting confused/messing up your design. However, if you do end up using the glossy paint in the wrong spot, no worries—just paint over it!
(7) Paint The Tape Inner Edges w/ Flat Paint
Paint over the edges of the tape (on the inside where the glossy paint goes) with flat paint. This will seal the edges of the tape and any paint that gets underneath will be the same finish as the wall.
(8) Paint Your Glossy Stripes
After the edges are mostly dry, you can fill in your stripes using semi-gloss paint. I used a paintbrush to do 2 thick coats on each stripe, letting them dry for about 30 minutes between each one.
(9) Pull Your Tape & Let It Dry
Pull the tape from the wall while the paint is still tacky and let the wall dry completely. After seeing our finished design, we decided to add a few more stripes to the upper half of the wall to really make the stripes stand out. We repeated steps 7 & 8 and voila!
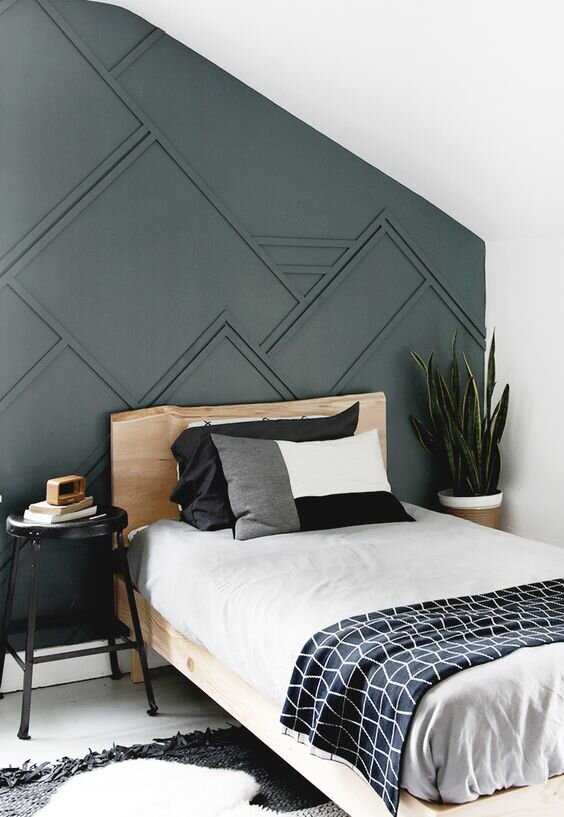
I just looove how the stripes add so much interest to the room while still blending into the background. Y’all already know I’m obsessed with black walls, so the stripes are really icing on the cake for me. I’m talking super beautiful, tasty, moody icing.
These stripes turned out uh-mazing and I can’t wait for the rest of the room to be finished so I can truly appreciate them. Right now the mattress of the floor is making it just a tad hard to focus on how cute the wall is, ha! Be sure to keep up with my progress on the One Room Challenge & follow me on Instagram for more pictures of this striped beauty!