How To Paint The Perfect Striped Accent Wall
I’m always looking for fun (& cheap) ways to make my apartment more unique. One of my favorite apartment upgrades is painting! Although some people don’t like the process involved with painting walls—mostly the repainting when your lease it up part— I still think it’s a quick, easy, and inexpensive way to change the look of your home in a big way.
But before we get into the tutorial, a bit of background…
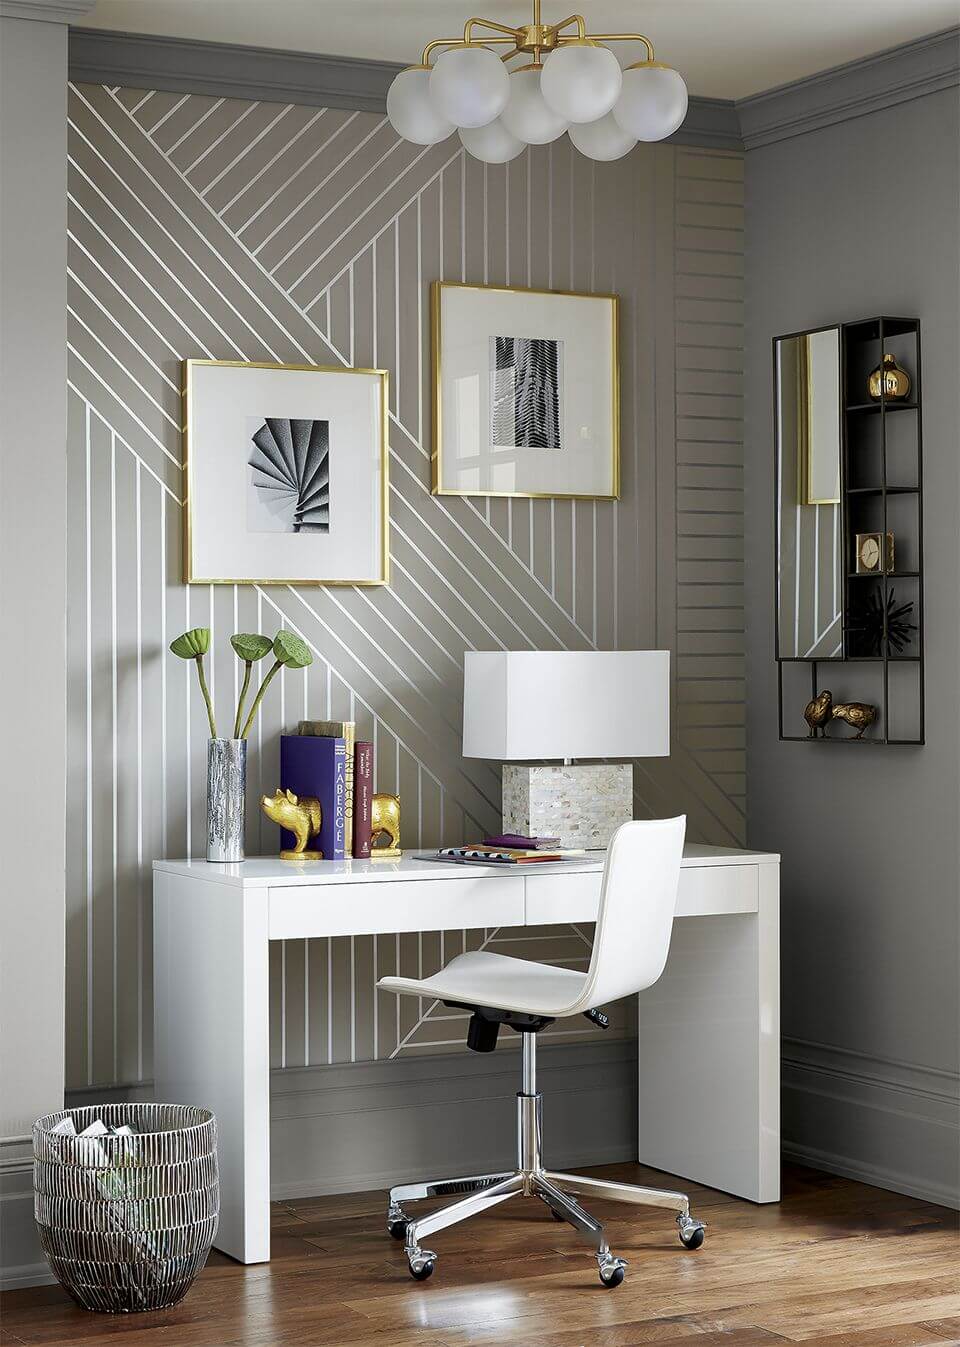
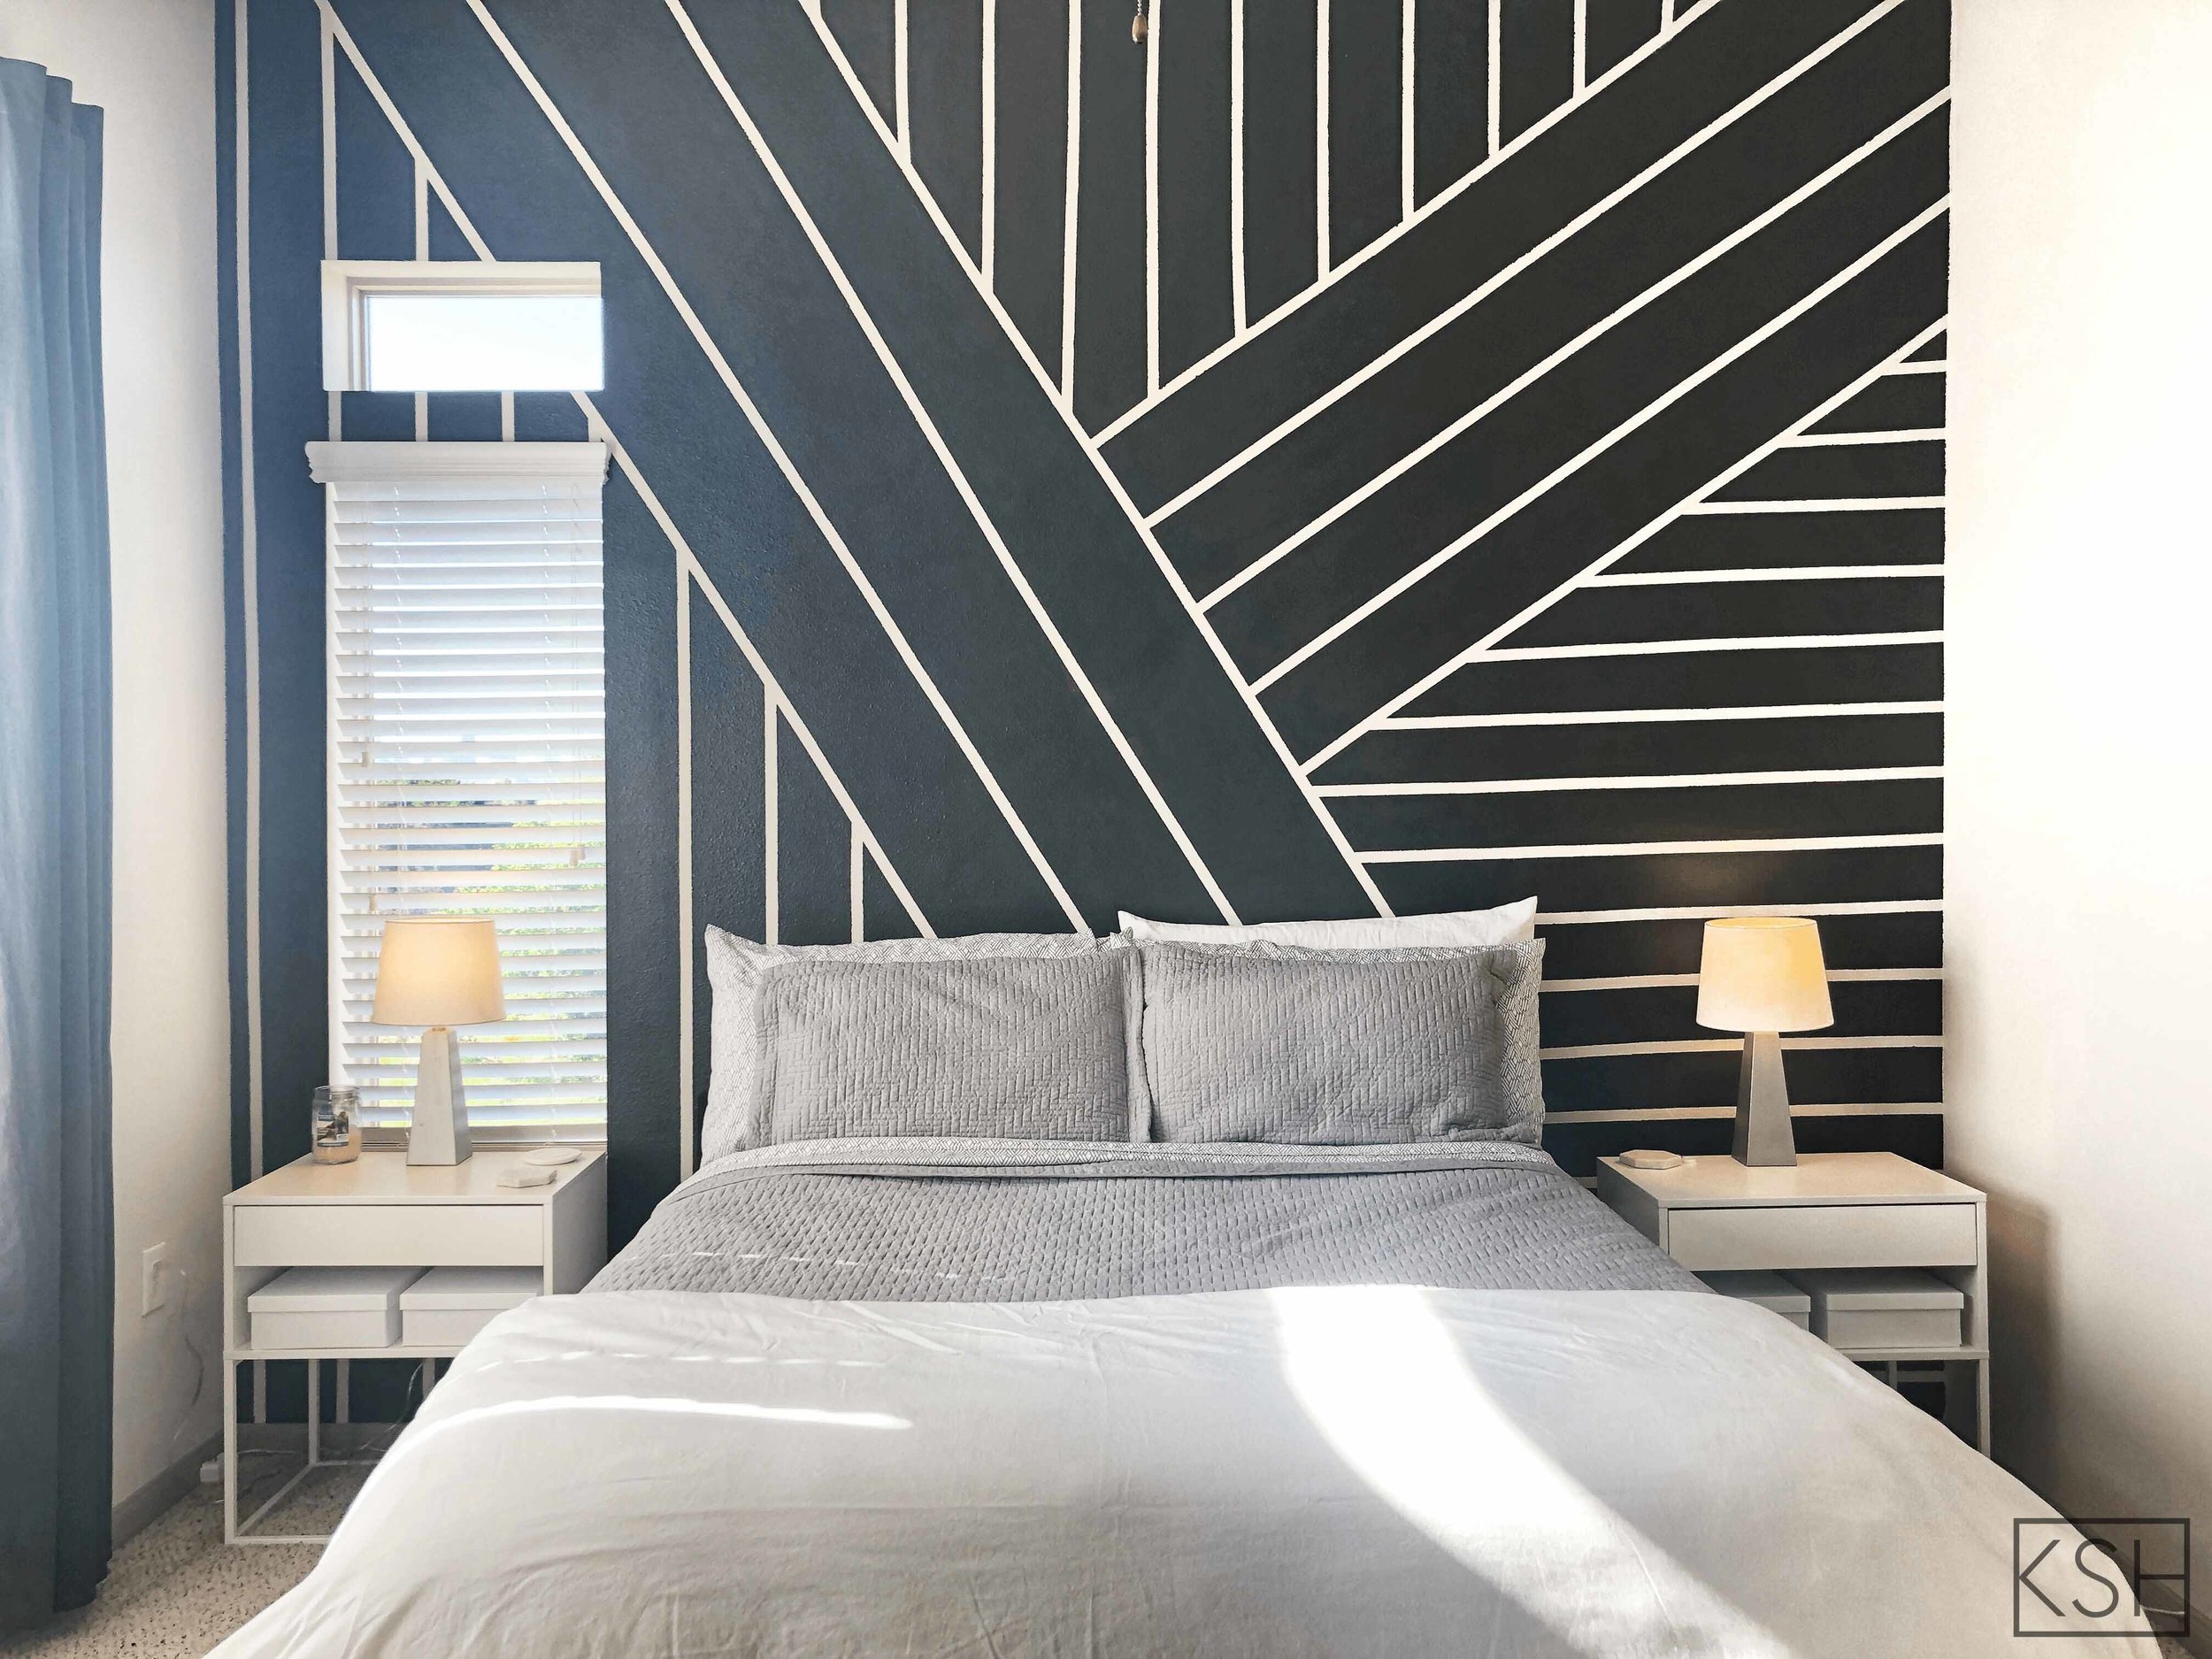
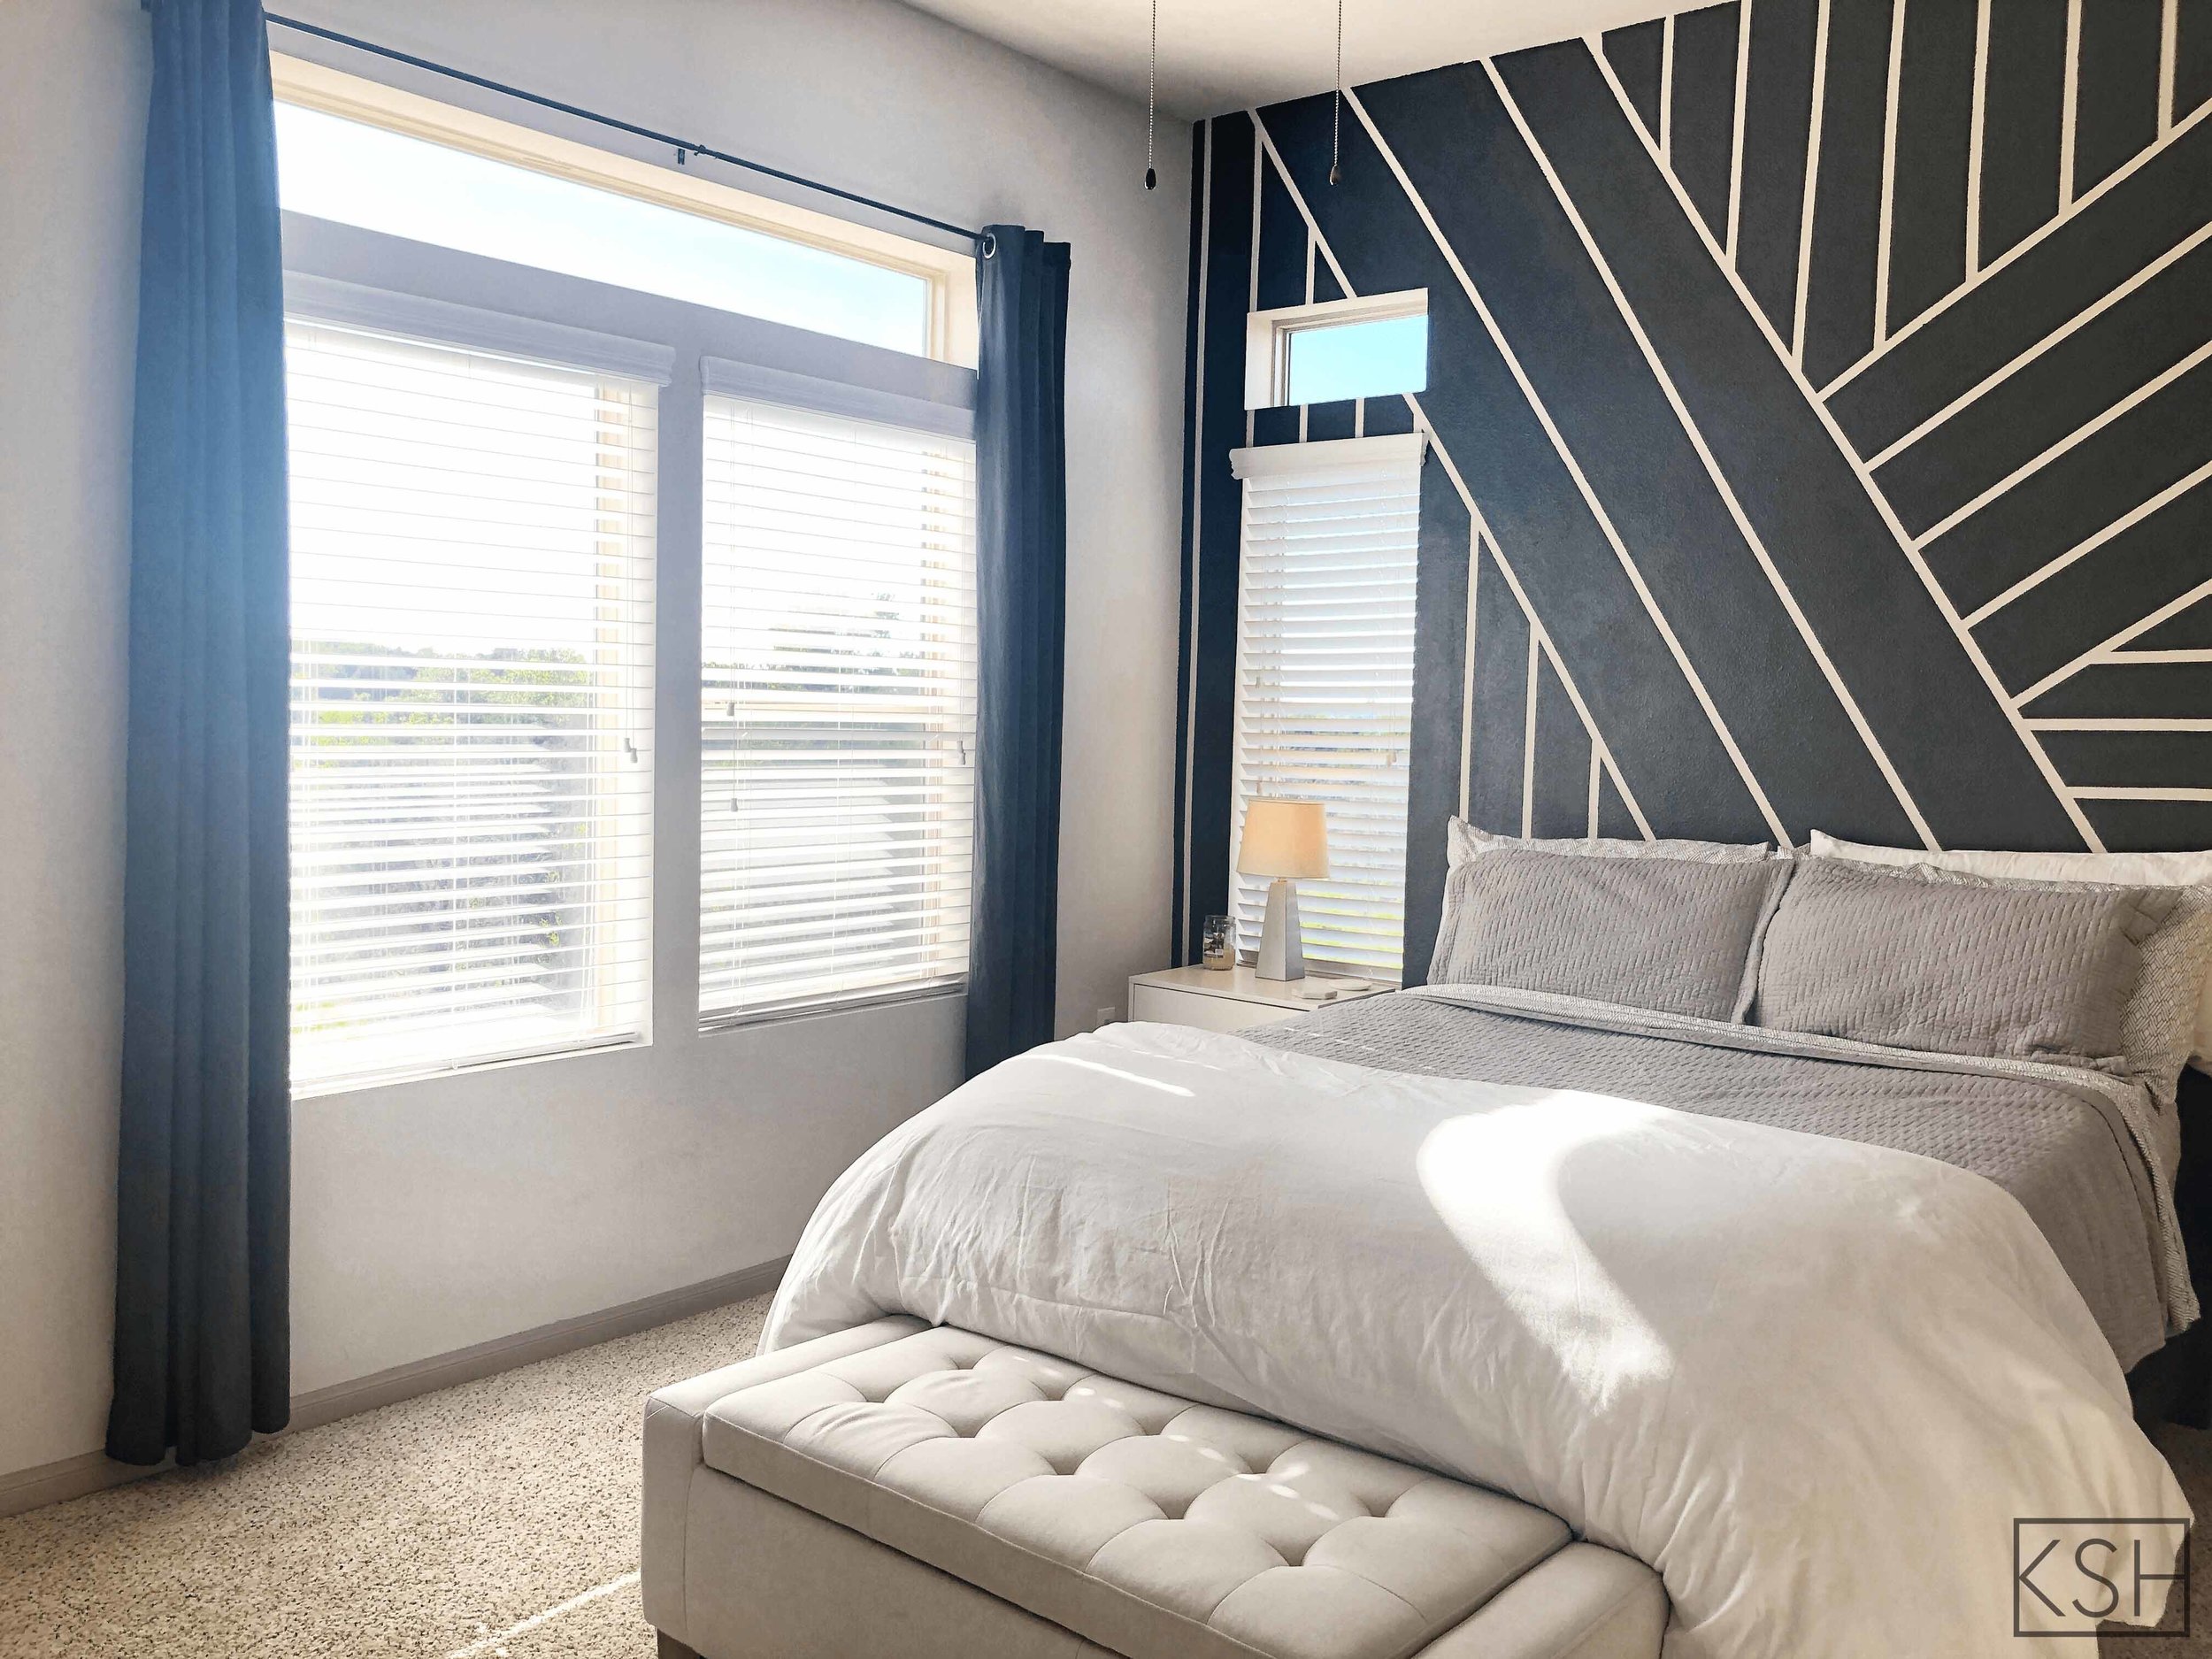
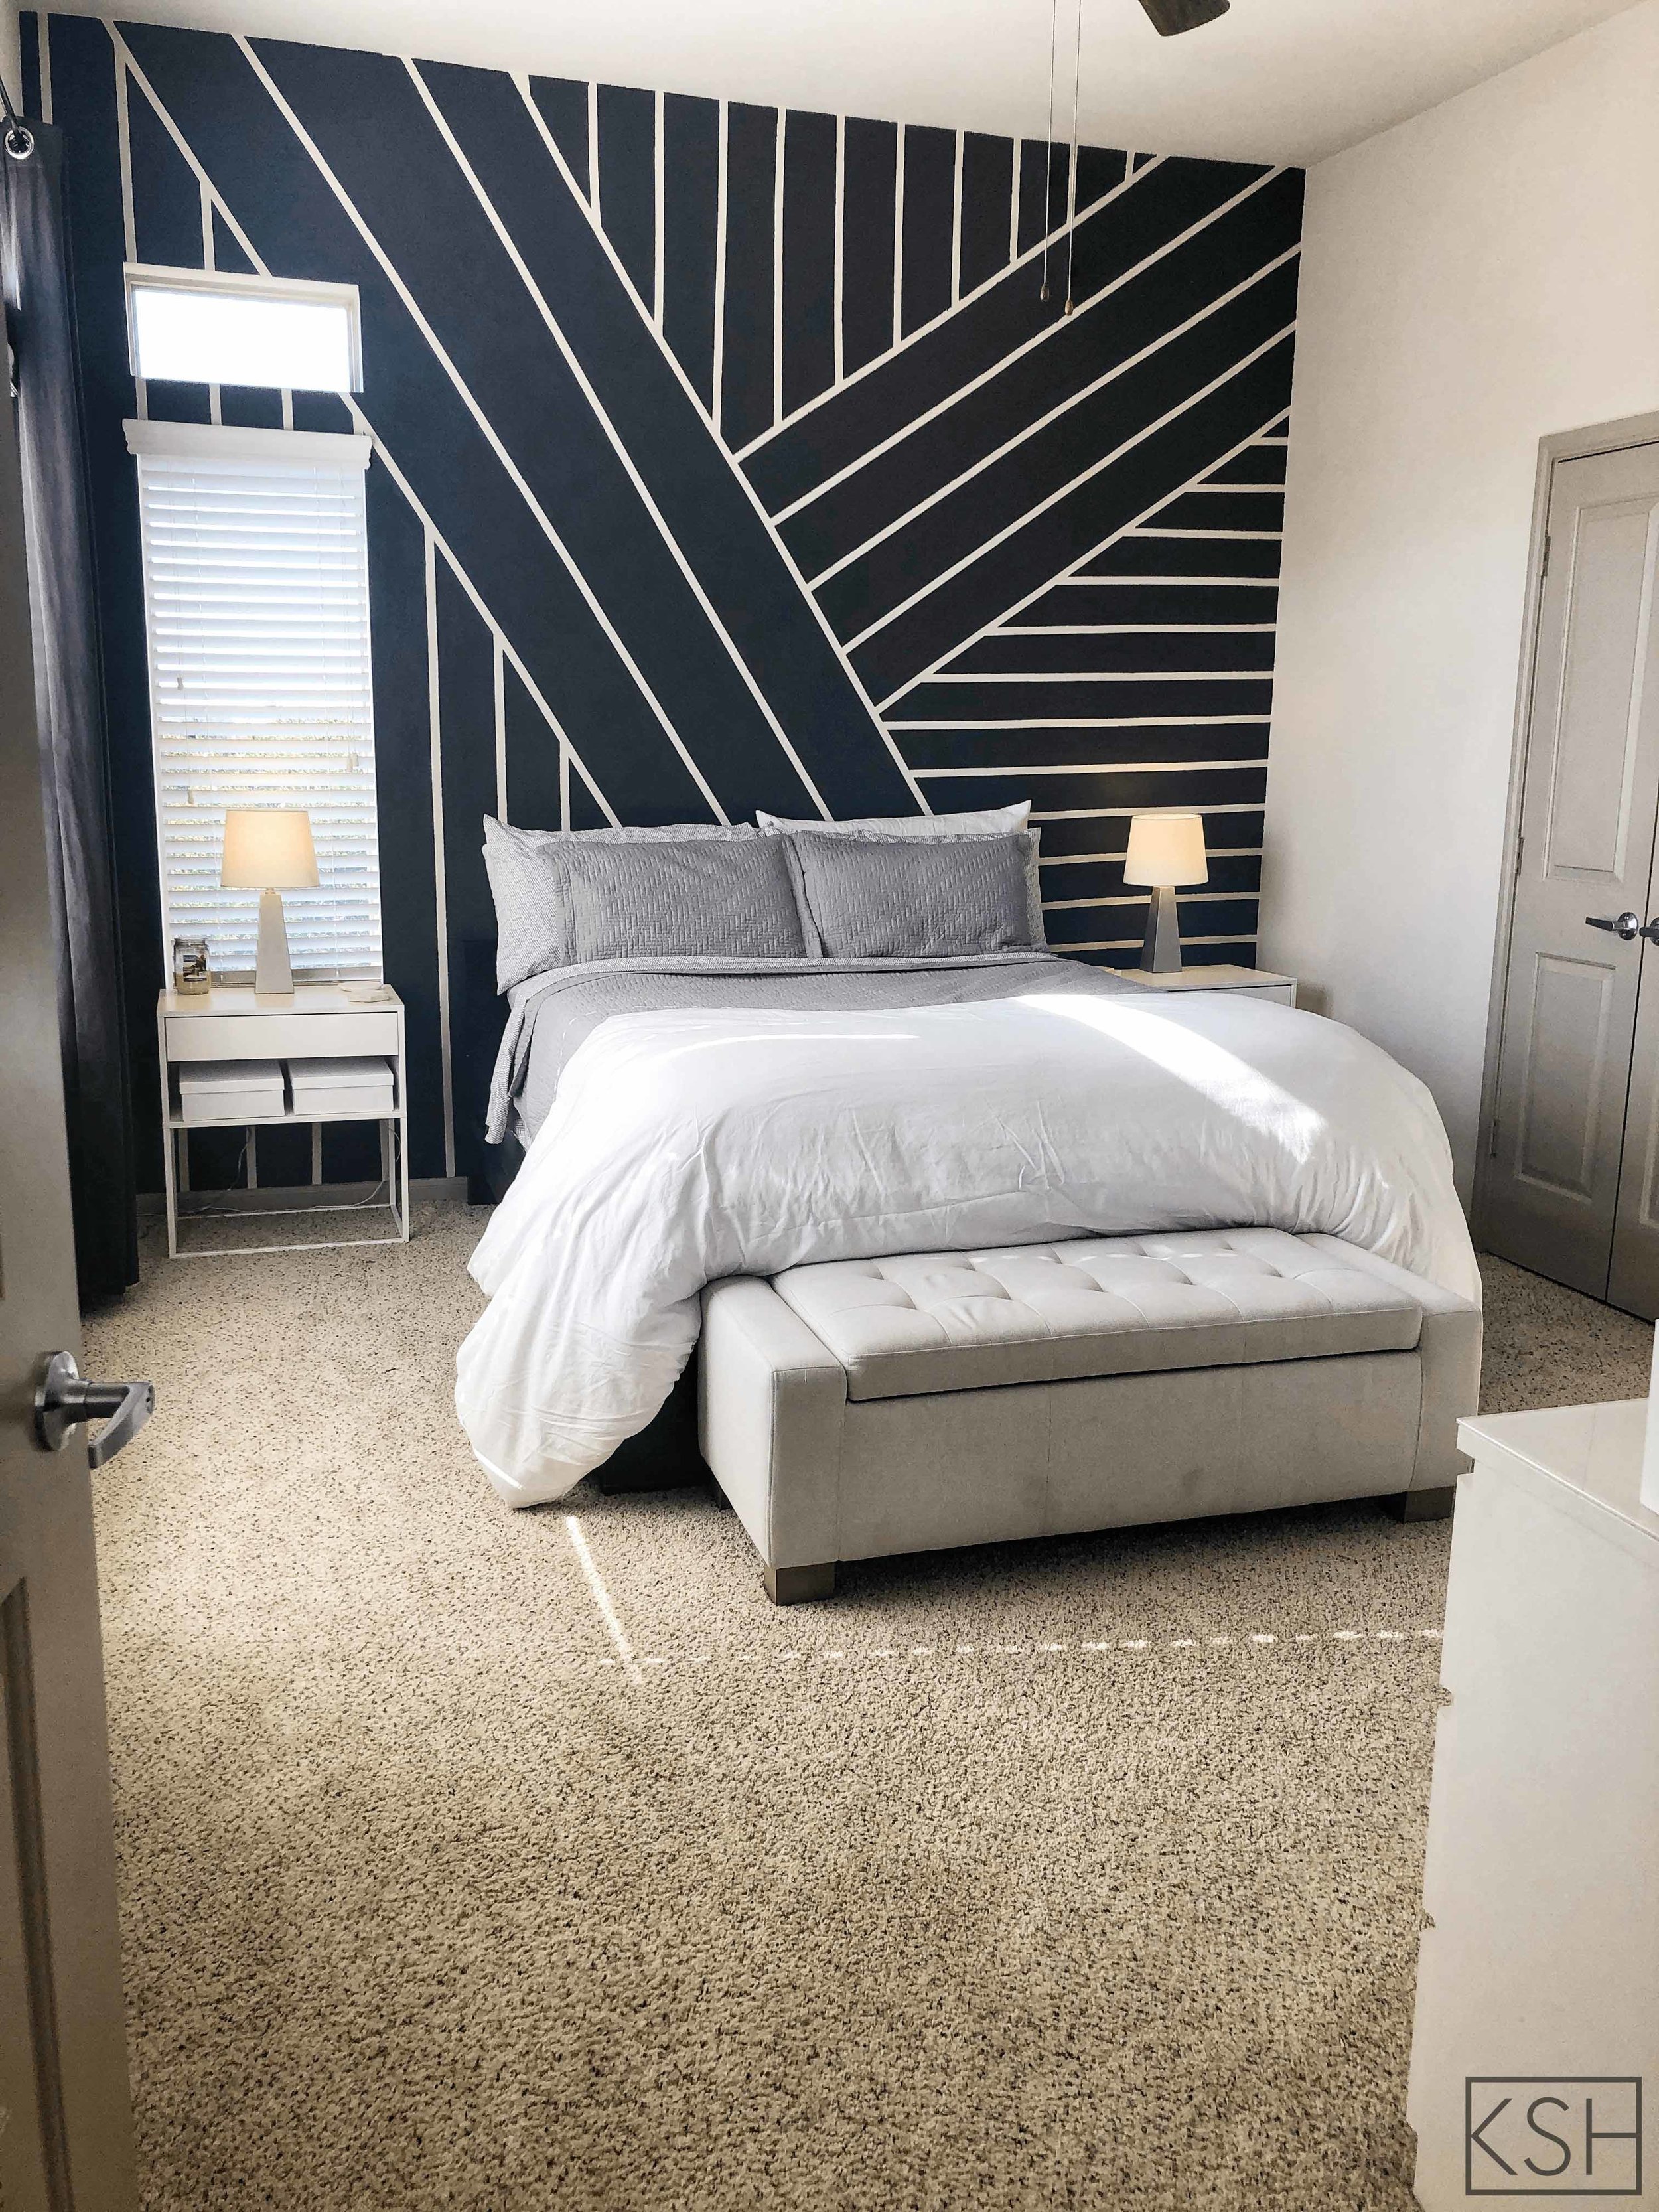
A while back I came across this image of an accent wall by CB2 and absolutely fell in LOVE.
CB2’s wall is created using DIY-able wall paper (you can read about it here), but I chose to paint my stripes directly on the wall. Why? Well mainly because I didn’t feel like buying wallpaper. But, aside from laziness:
Once you cut the sheets of wallpaper to fit your wall size, that’s it. It’s not reusable, and even if it was, you’ve already cut it to a specific size so it may not work in your next home. Since I’d be throwing the wallpaper away in the end anyway, it was easier just to paint directly onto the wall, which brings me to my next point…
My apartment complex allows us to paint/alter the walls, as long as we return them to normal before we move out, so this was a pretty “duh” move. If your landlord doesn’t allow this, I’d definitely recommend using the self-adhesive wallpaper. It’s very renter friendly and peels right off when you’re done. No mess!
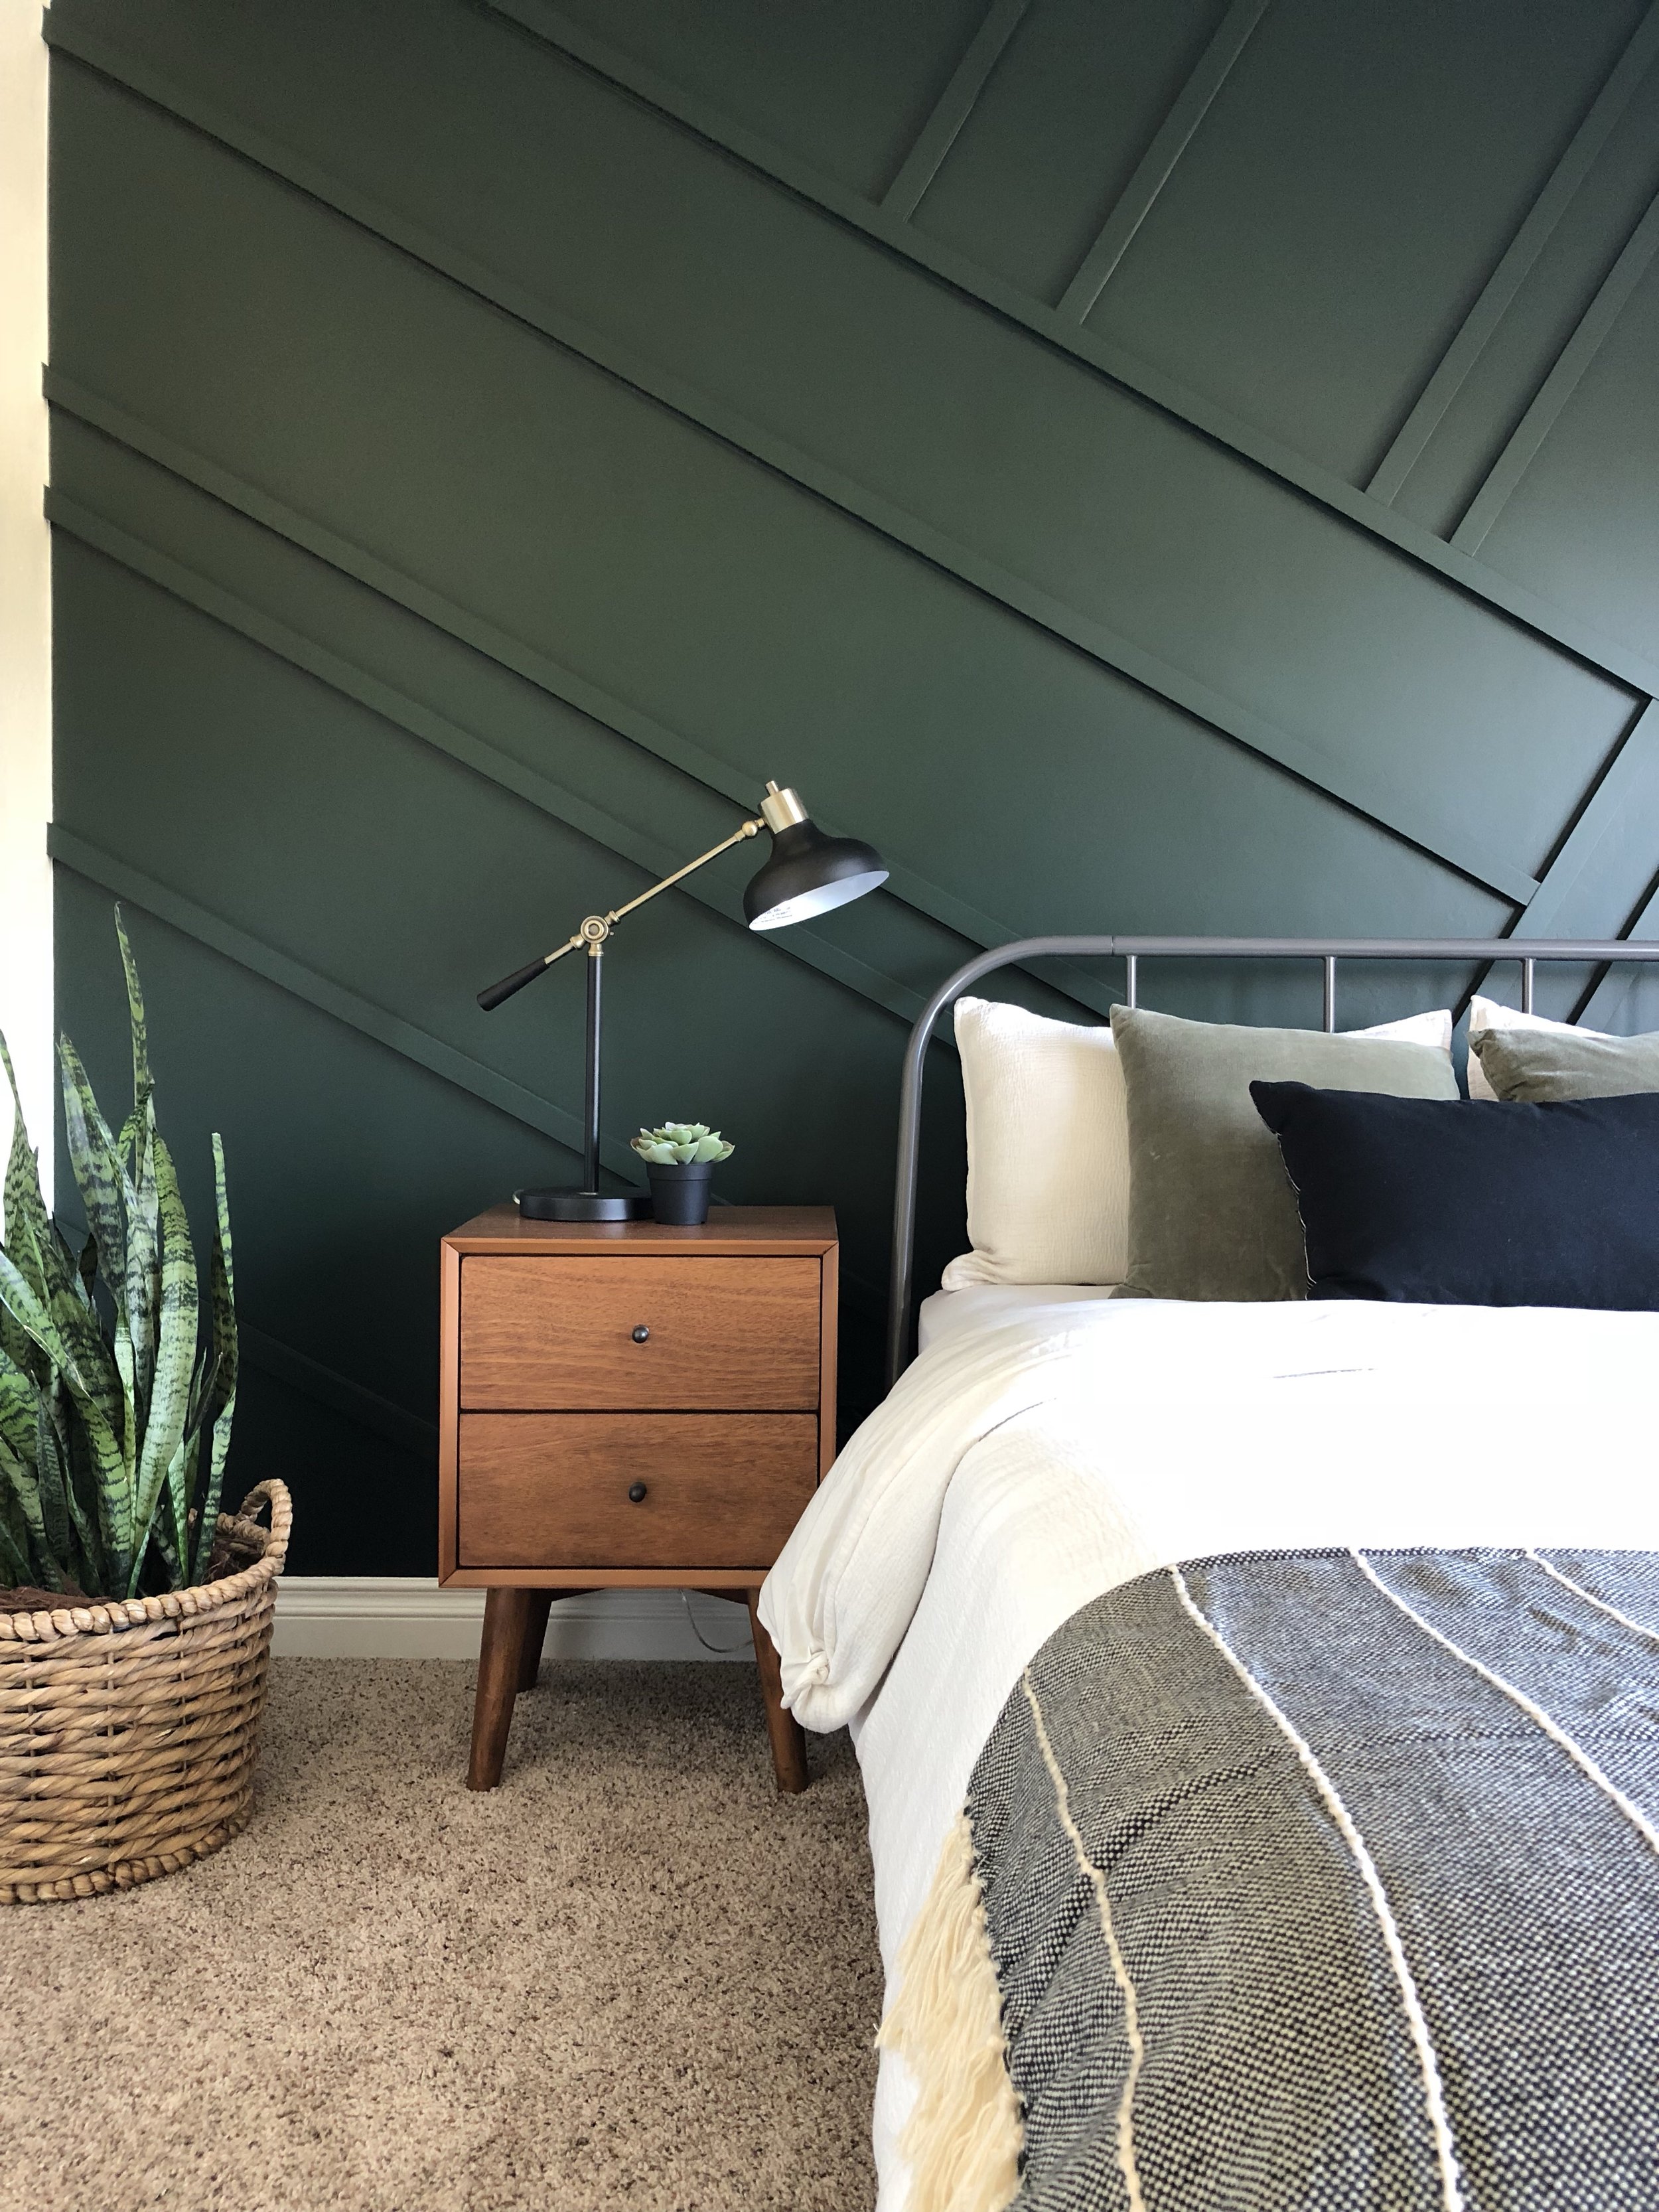
Anyway, since painting my accent wall last summer, I’ve noticed SO many other bloggers adding similar geometric striped walls in their homes. I’ve tagged a couple of my favorites below. They use wood paneling to create monochromatic 3D stripes look instead of varying paint colors. I love it! It’s such a cool way to add interest to a space and I can’t wait to try it when I finally leave this renting life behind.

So without further ado, let’s get to the painting process!
Materials
I didn’t use anything special to paint the stripes honestly— just the inspiration image, painter’s tape, paint, a measuring tape, and a pencil/pen. Halfway through painting I ran out of painter’s tape and started using masking tape instead of buying more because, well, like I said, I’m lazy. Painter’s tape works SO much better though, so make sure you have a couple rolls on deck.
Painting Process
Just as a side note—When I did this project this wall I had no idea I’d be starting a blog so I didn’t have many pictures of the process. I took a couple to add to this post to help explain, but obviously the stripes are already complete. Hopefully the fake in-progress pictures will still be helpful, but feel free to ask any questions you may have in the comments!
1) I started by taping off the diagonal lines first.
Start at the top left corner of the wall and stretch the tape down and to the right. Make sure to keep the tape as straight as possible—don’t let it fold or curve. For some of the longer lines, I had to cut the tape into smaller sections to keep the tape from curving. You don’t have to worry about what angle you’re placing the tape at, as long as the tape is straight.
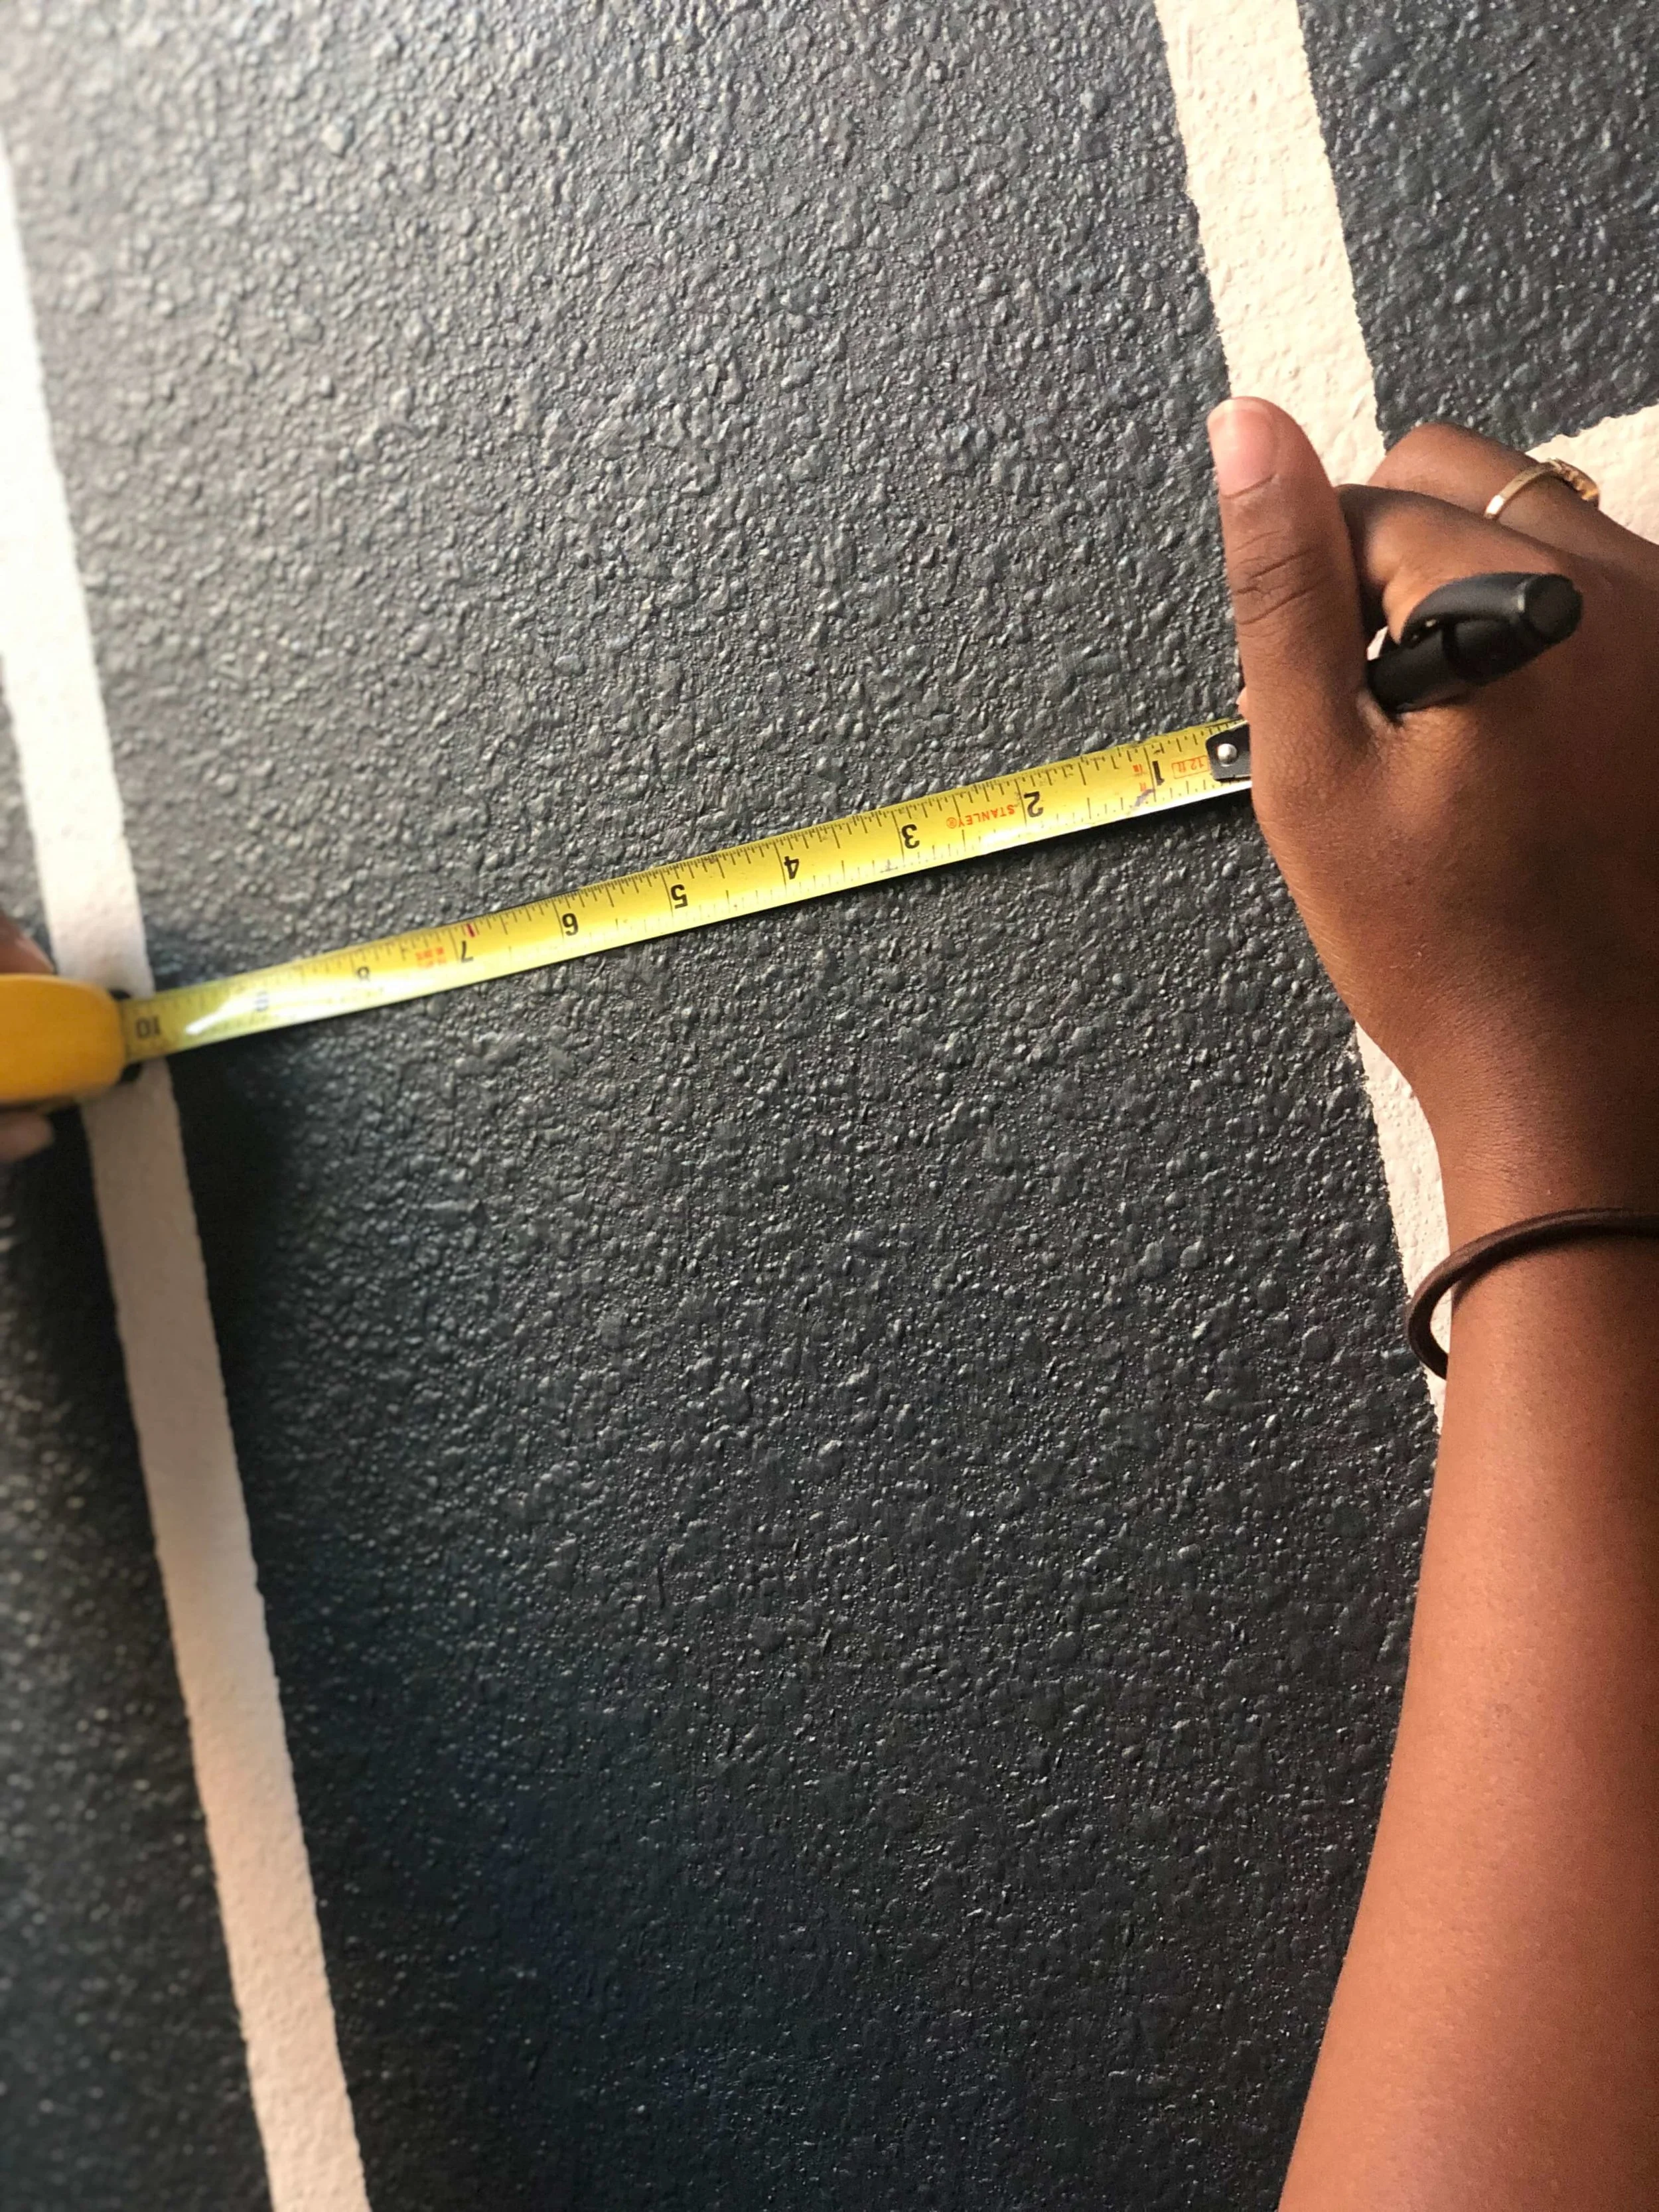
2) After the first line of tape is up, use your measuring tape to measure out from the edge of the tape.
I wanted the diagonal stripes pretty thick, so I measured out 10 in and mark a straight line at the end of the tape. Continue this down the entire length of the tape. I varied the size of my stripes—the horizontal stripes are 4.5 in., and the vertical stripes are 6 in—but you can make them all the same width if you want. It’s all personal preference.
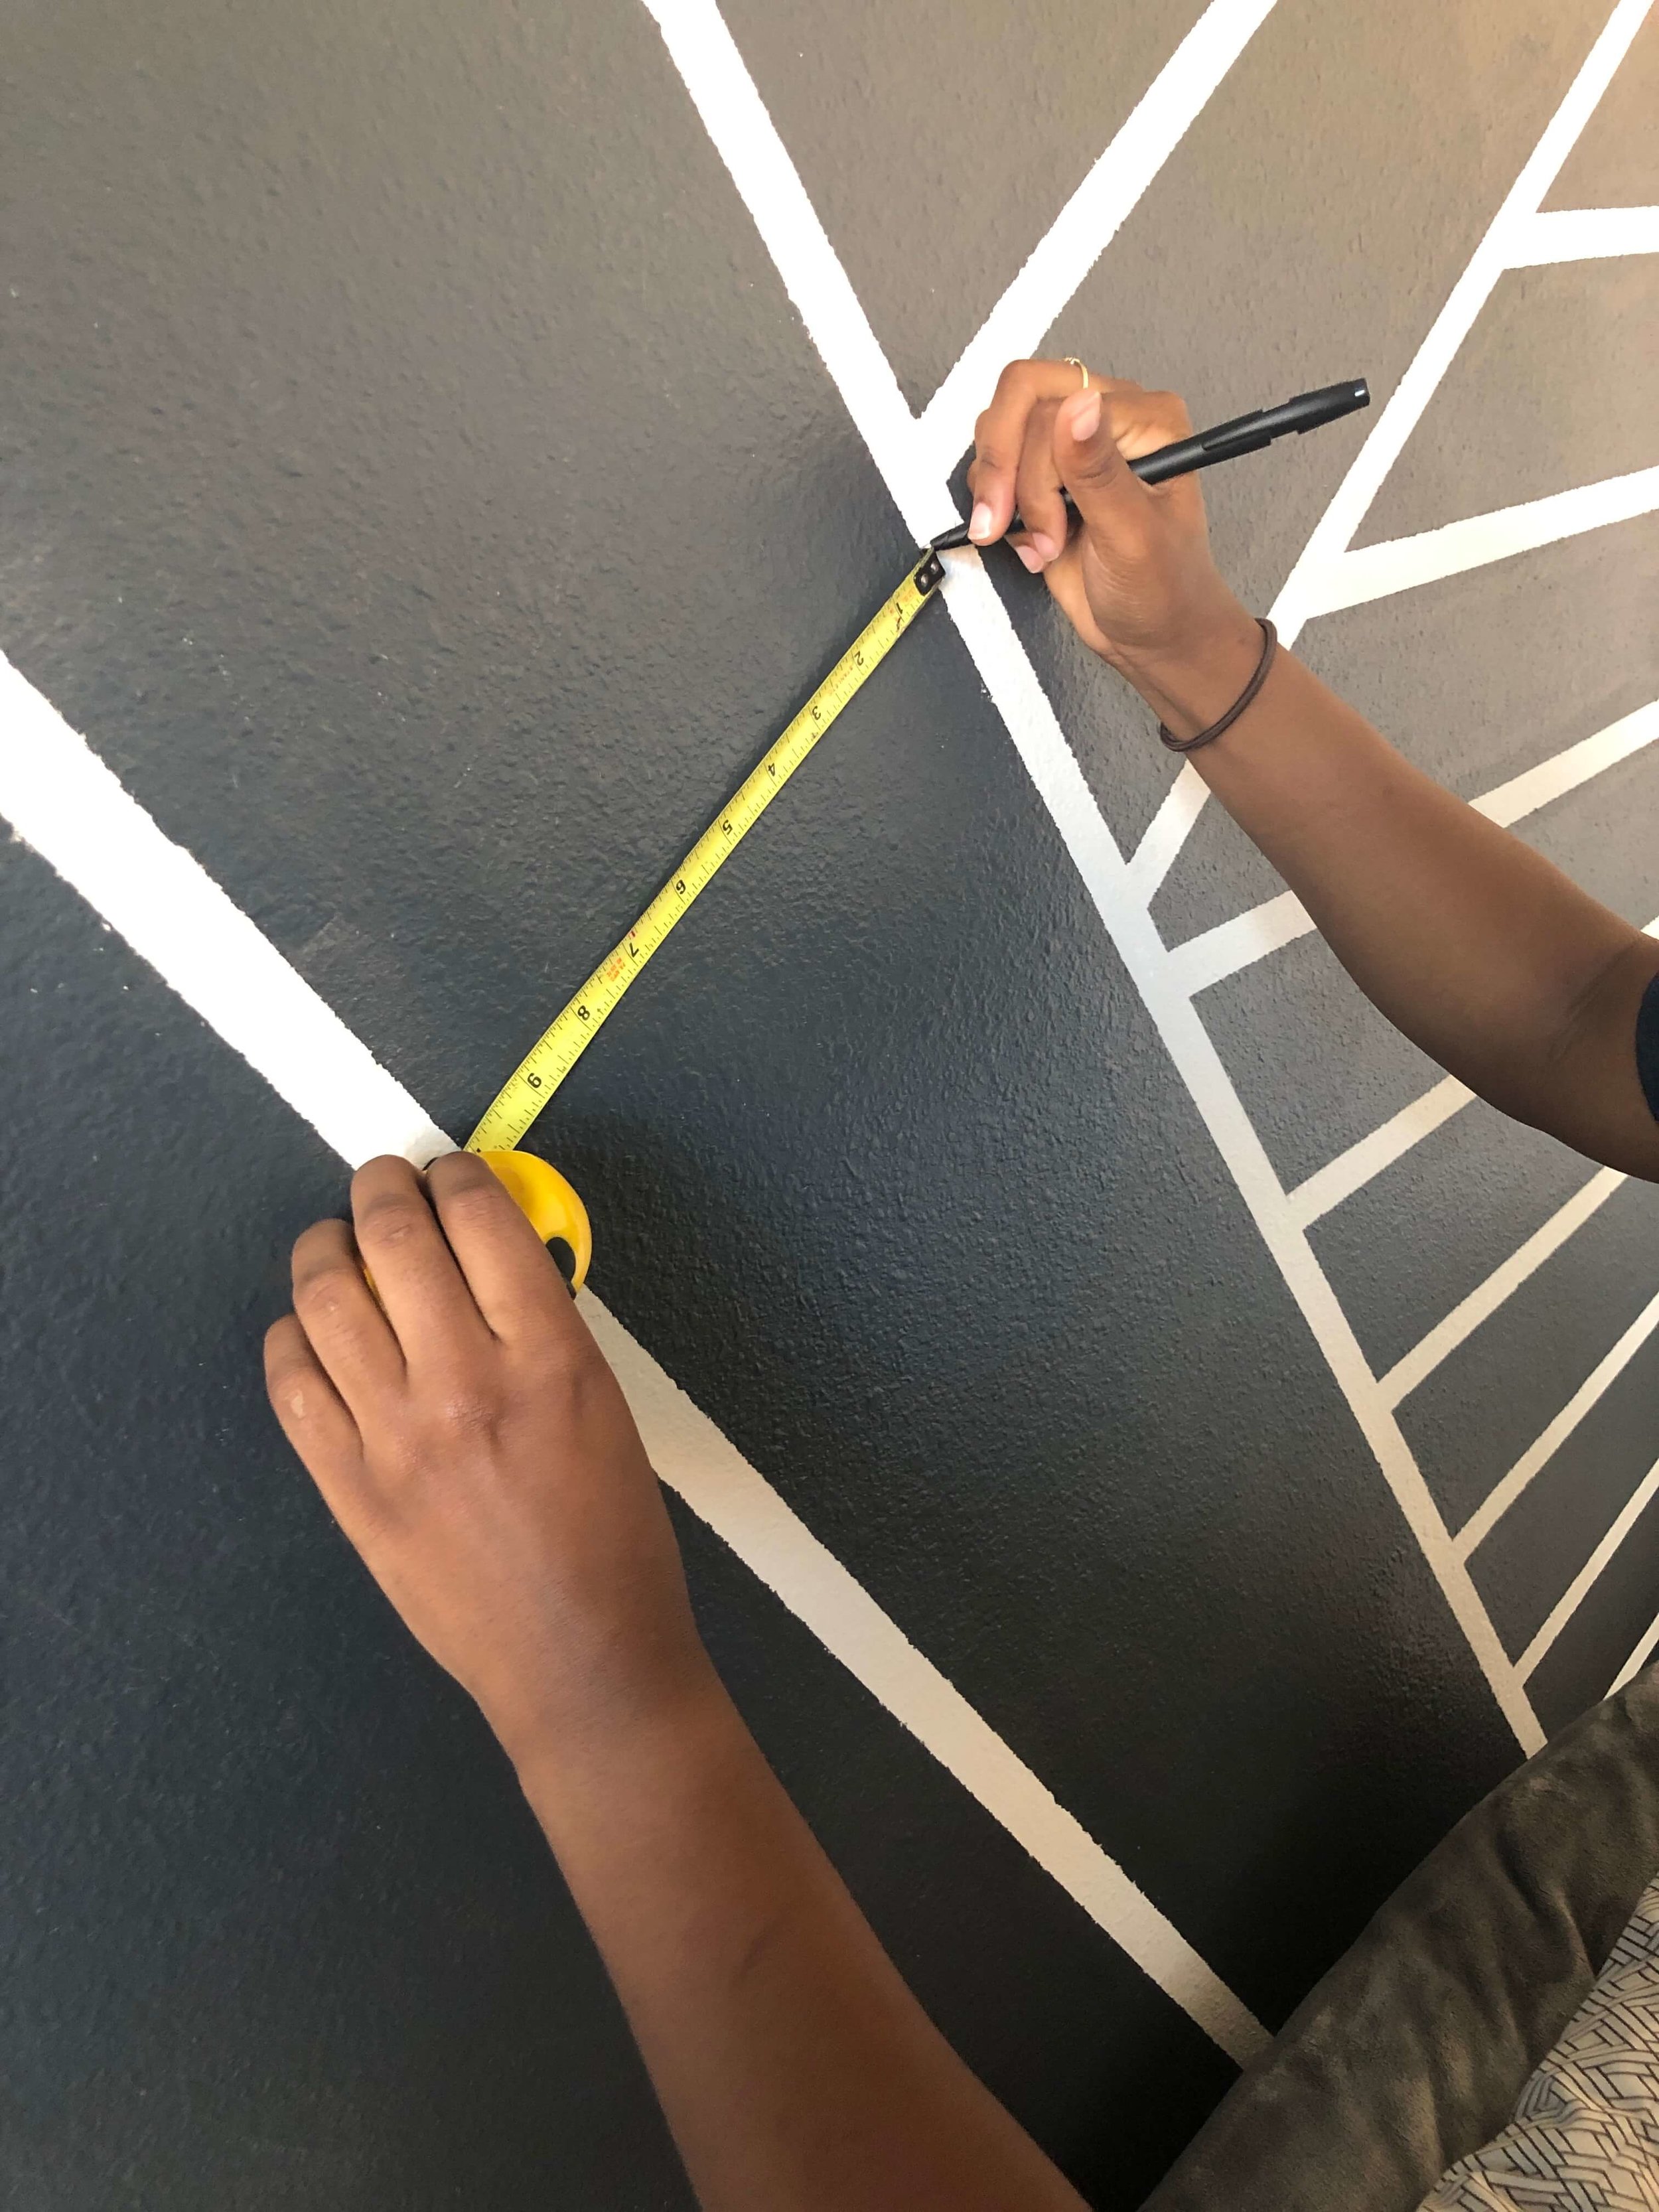
3) Line up your next piece of tape with the measured lines you just drew.
Keep in mind that your measurement goes from the inside edge of one piece of tape to the inside edge of the other. Make sure you always place your tape outside of your marked lines to keep them consistent.
4) Repeat the taping and measuring steps across the entire wall.
The process isn’t hard, just a bit time consuming. As you’re taping off your stripes, refer to your inspiration image often. This will help you make sure your following your intended pattern. It also helps to back up from the wall every now and then to see the image as whole. There were a couple of times my lines started to get a little wonky, but I was able to fix it pretty quickly by taking a step back to get a full look at wall after I laid each piece of tape.

As you can see, I ran out of painter’s tape pretty early into the project. Definitely poor planning on my part. So take it from me, have plenty of rolls of painter tape ready to go. 0/10 would recommend using masking tape. Also, make sure your painter’s tape is all the same width (I used 1 in.) or your stripes will end up funky.
5) Get a little handsy with the tape.
But seriously though, run your hand across all of the pieces of tape to make sure they’re tightly stuck to the walls, with no bubbles or lifting pieces. This will help keep the lines crisp.
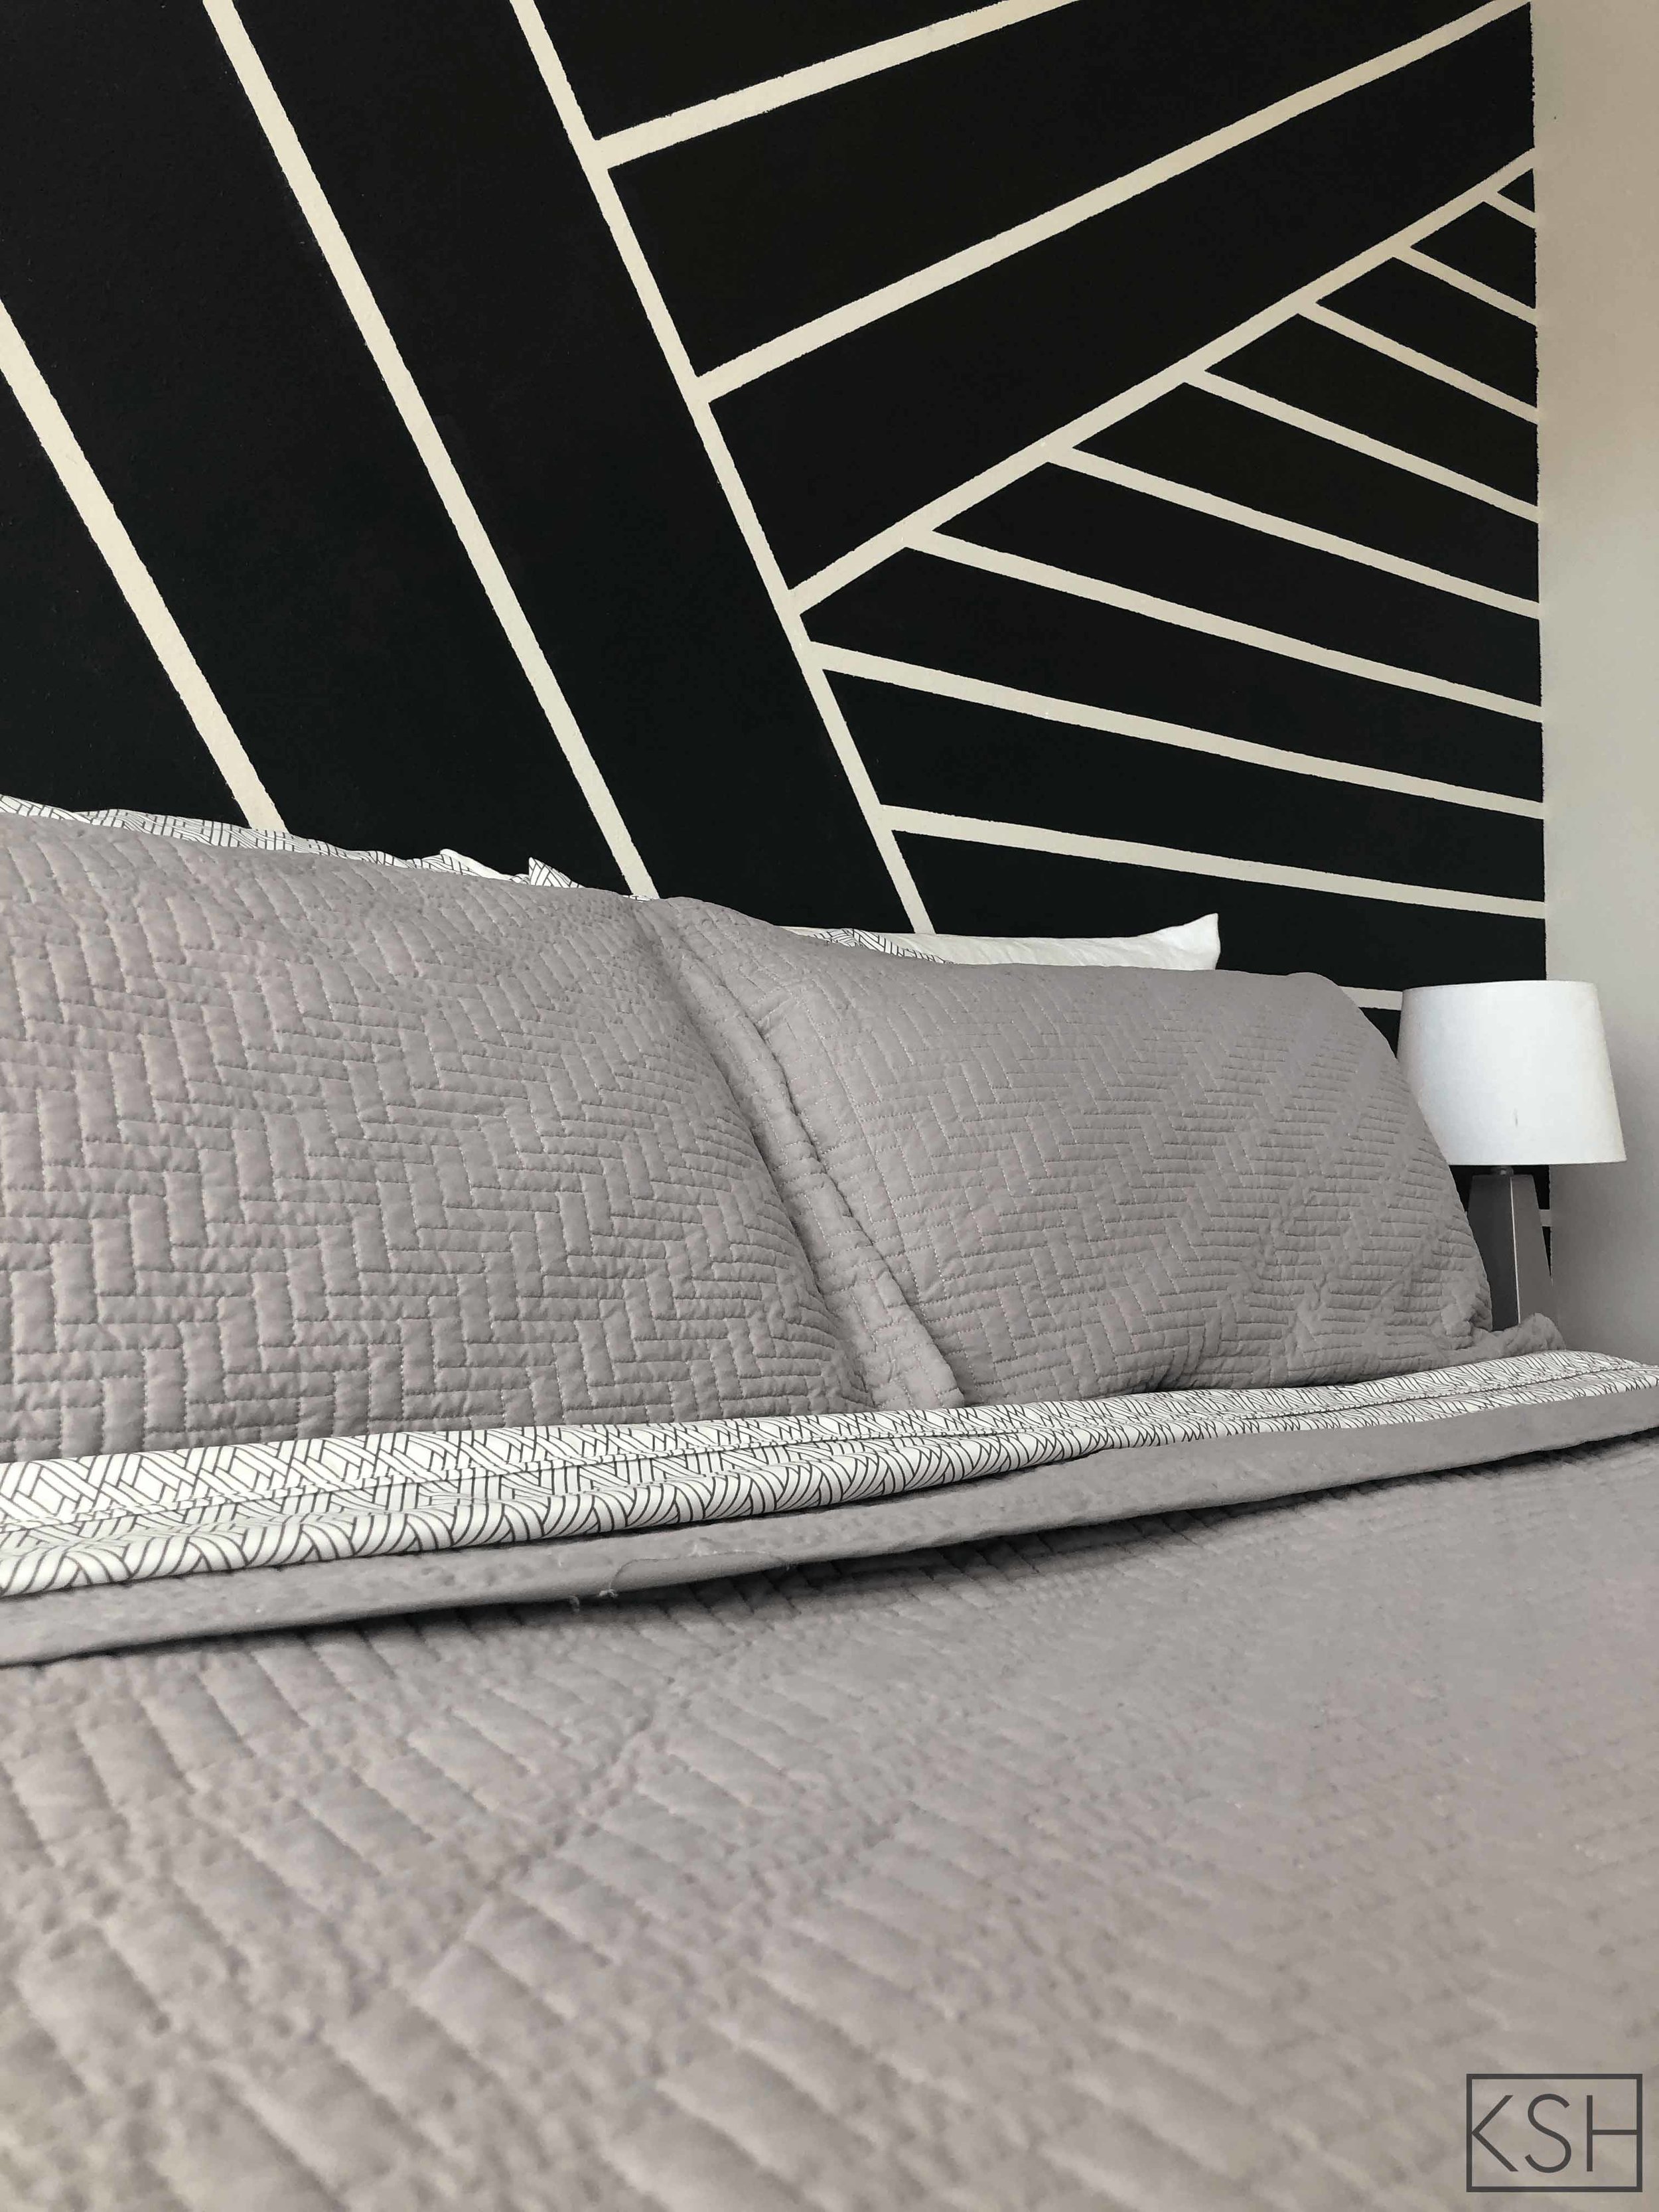
6) Paint the wall the color of your choice. I used Satin Black in a satin finish from Behr (Home Depot).
I painted the entire wall using a paint brush just going stripe by stripe or, sometimes, section by section. I definitely recommend using a paint brush over a roller if you have textured walls like I do. The paint brush made it easier to control where the paint was going and prevent paint from getting under the tape.
*Bonus Tip: For absolutely perfect lines on ANY type of wall, paint the stripes the original wall color first. This helps “seal” the tape to the wall and any paint that gets under the tape will be the same color are the wall. Get it? After that coat dries, then you can paint over the stripes with the new color. I’d still recommend using a paint brush, or a small roller. A large roller will get too much paint on the tape making it hard to tell where the stripes should be.*
7) While the painted stripes are still somewhat wet, you can pull the tape. This will prevent the paint from drying on the tape and peeling later.

8) After you remove the tape, you may need to touch up a few spots.
Since I didn’t “seal” the tape with the original wall color, I did have a few spots where the grey paint got underneath the tape. This mostly happened on the areas done with masking tape though, and even then, there were only a couple.
The entire painting process took me 2 days to complete alone, but it would definitely take less time if you have someone to help you out. Once the tape is peeled, the wall is touched up, and the paint is dry…enjoy! Treat yourself to a new comforter or rug to compliment your space. You deserve it (and so does your room)!
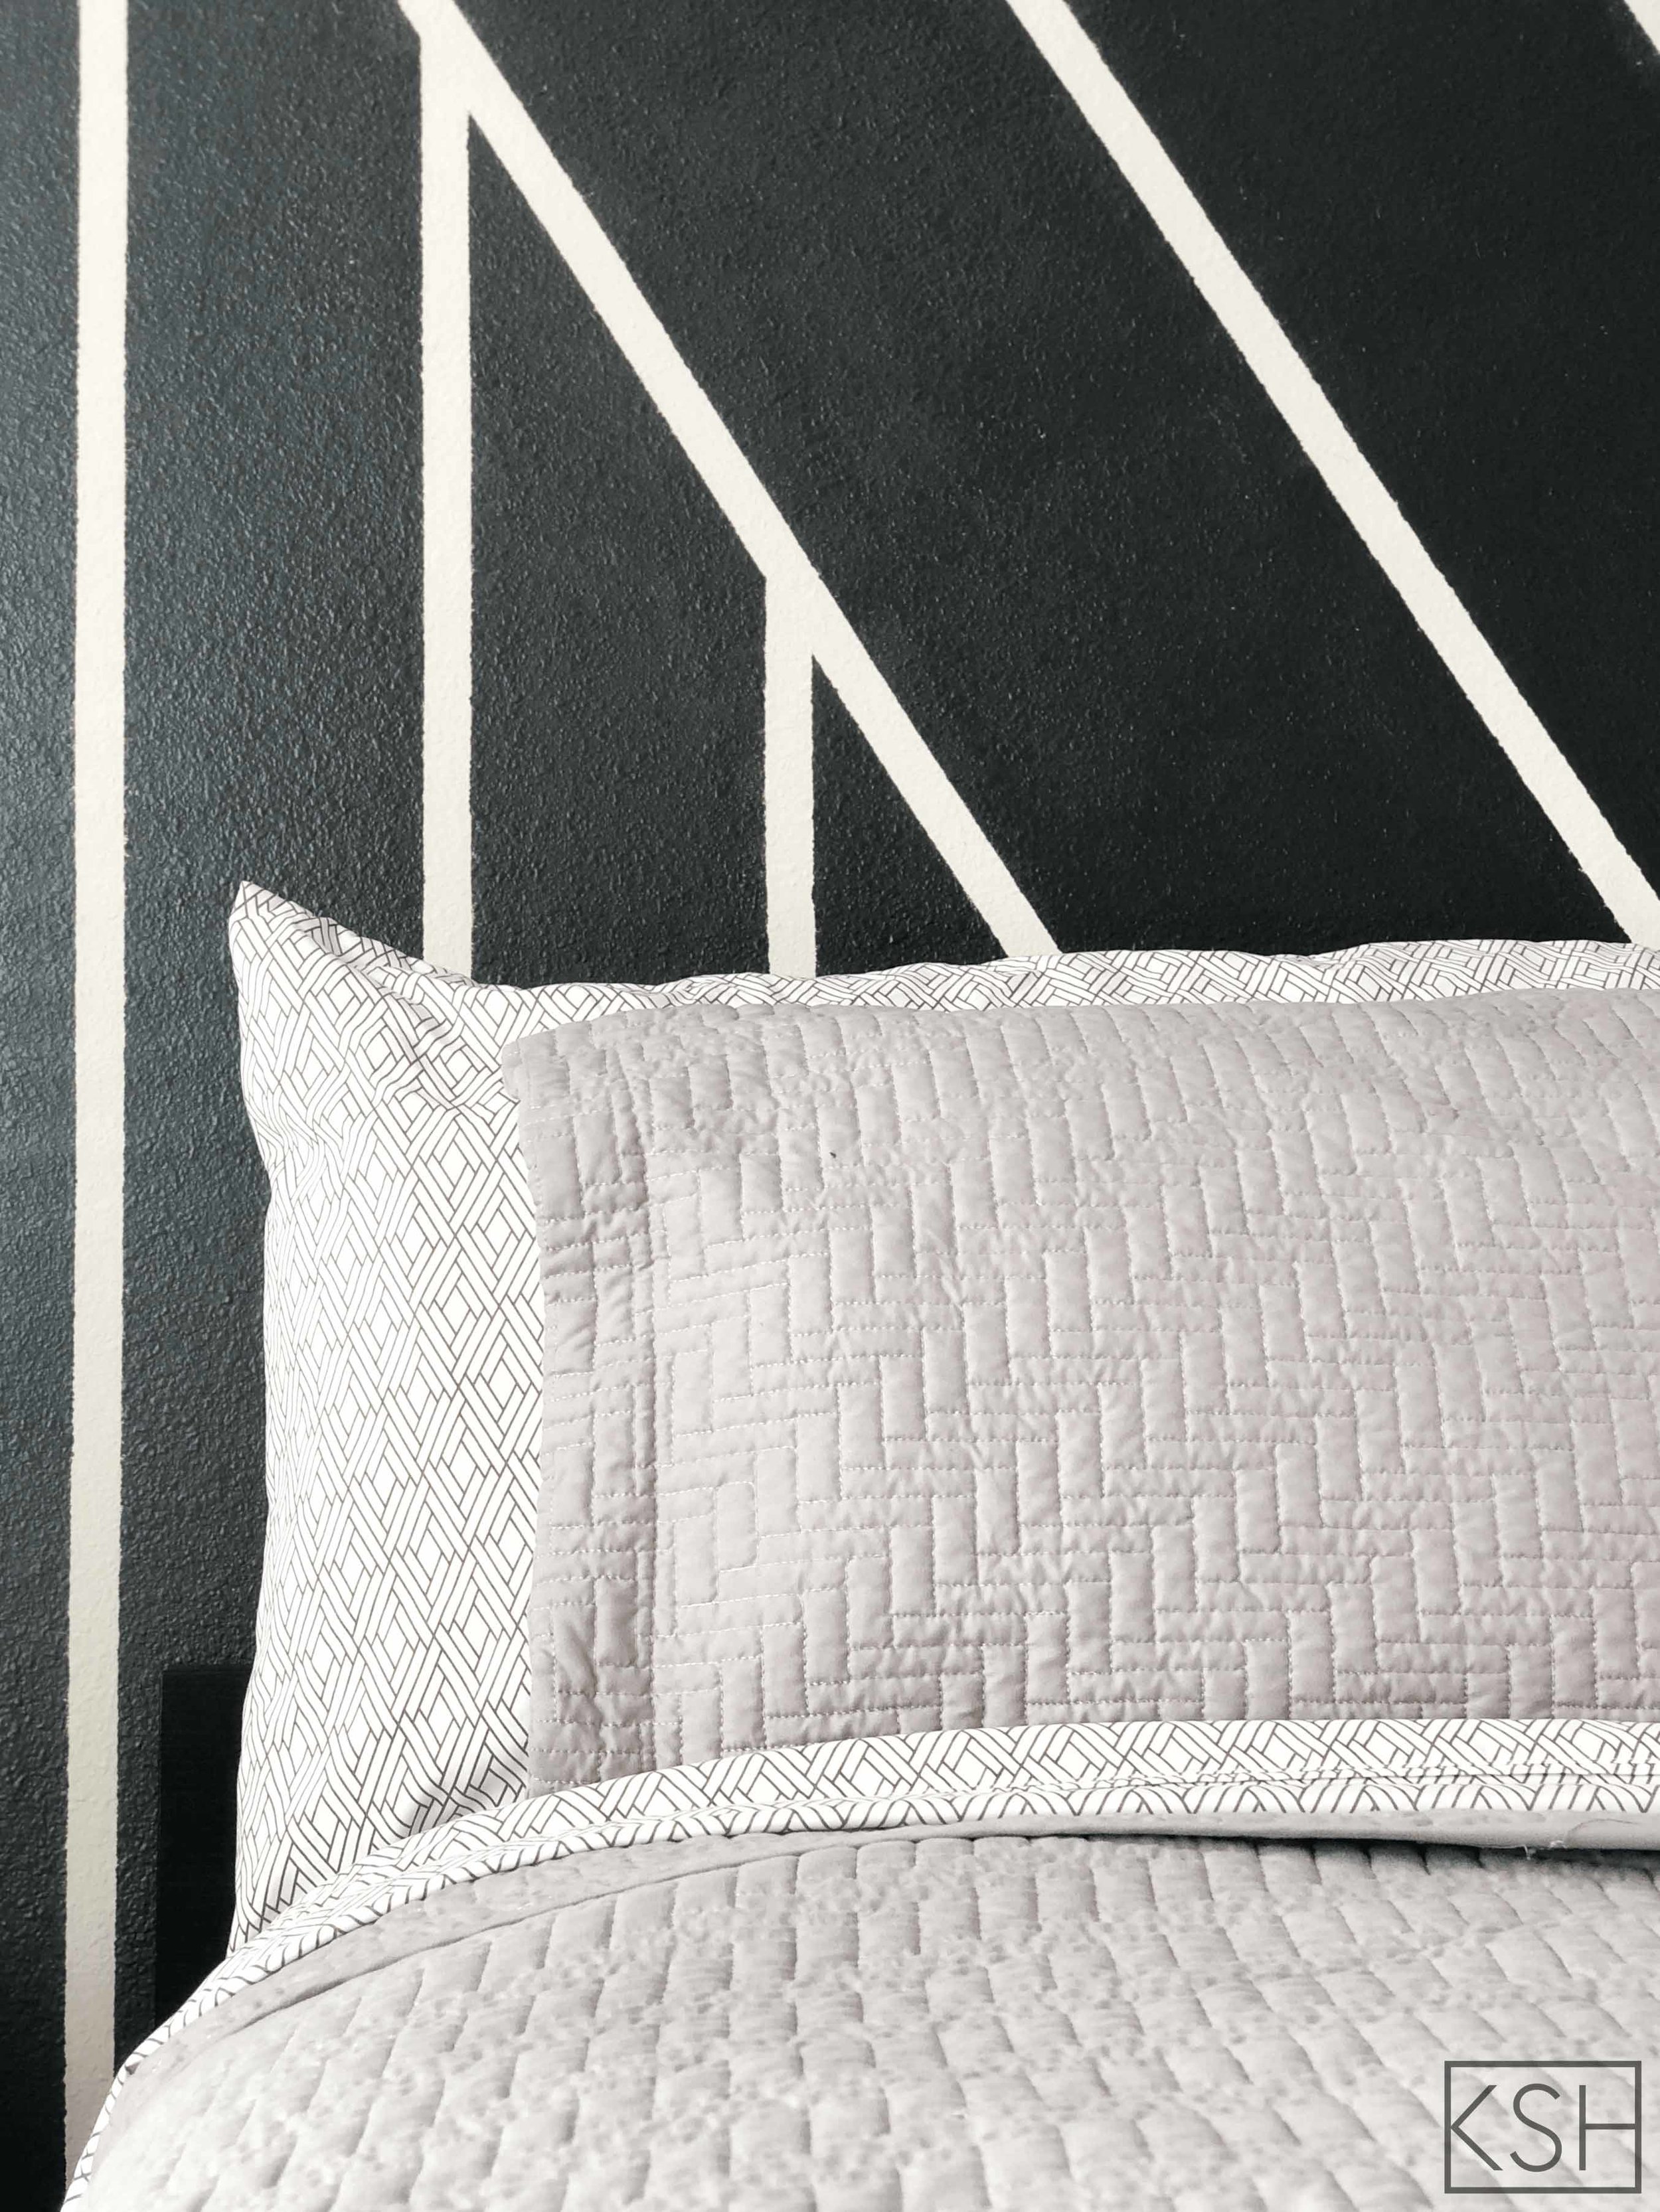
I’ve loved having this accent wall the past year & always get so many compliments on it. The funniest part is, everyone that sees it always asks me if it’s wallpaper. I think that means I did a pretty good job of making it look professional. *flips hair*. I will be moving soon, so I’ll be painting over the stripes, but stick around to see what I do in my next apartment. Hint: I’m thinking bigger & better!