Guest Bathroom Makeover - Budget Breakdown!
I still can’t get over my guest bathroom transformation!
It’s probably the biggest mini-makeover I’ve ever done on a space and it turned out even better than I envisioned. “But Kayla, what do you mean “biggest mini-makeover?” Welllll, when I first planned this project out, it was never meant to be a huge transformation or remodel of any sort. It was supposed to be (and still kind of was) a Phase 1 makeover to just give the room a little facelift.

A little background on this bathroom…
I’ve never liked it. Not completely anyway. We exhausted our upgrade budget pretty quickly when we designed this house-hello waterfall island and black windows-so we kept this bathroom pretty standard. (Also, sorry for the blurry before pic! I completely forgot to take before pictures and had to grab this screenshot from a walkthrough we did pre-closing #badblogger)
Love List:
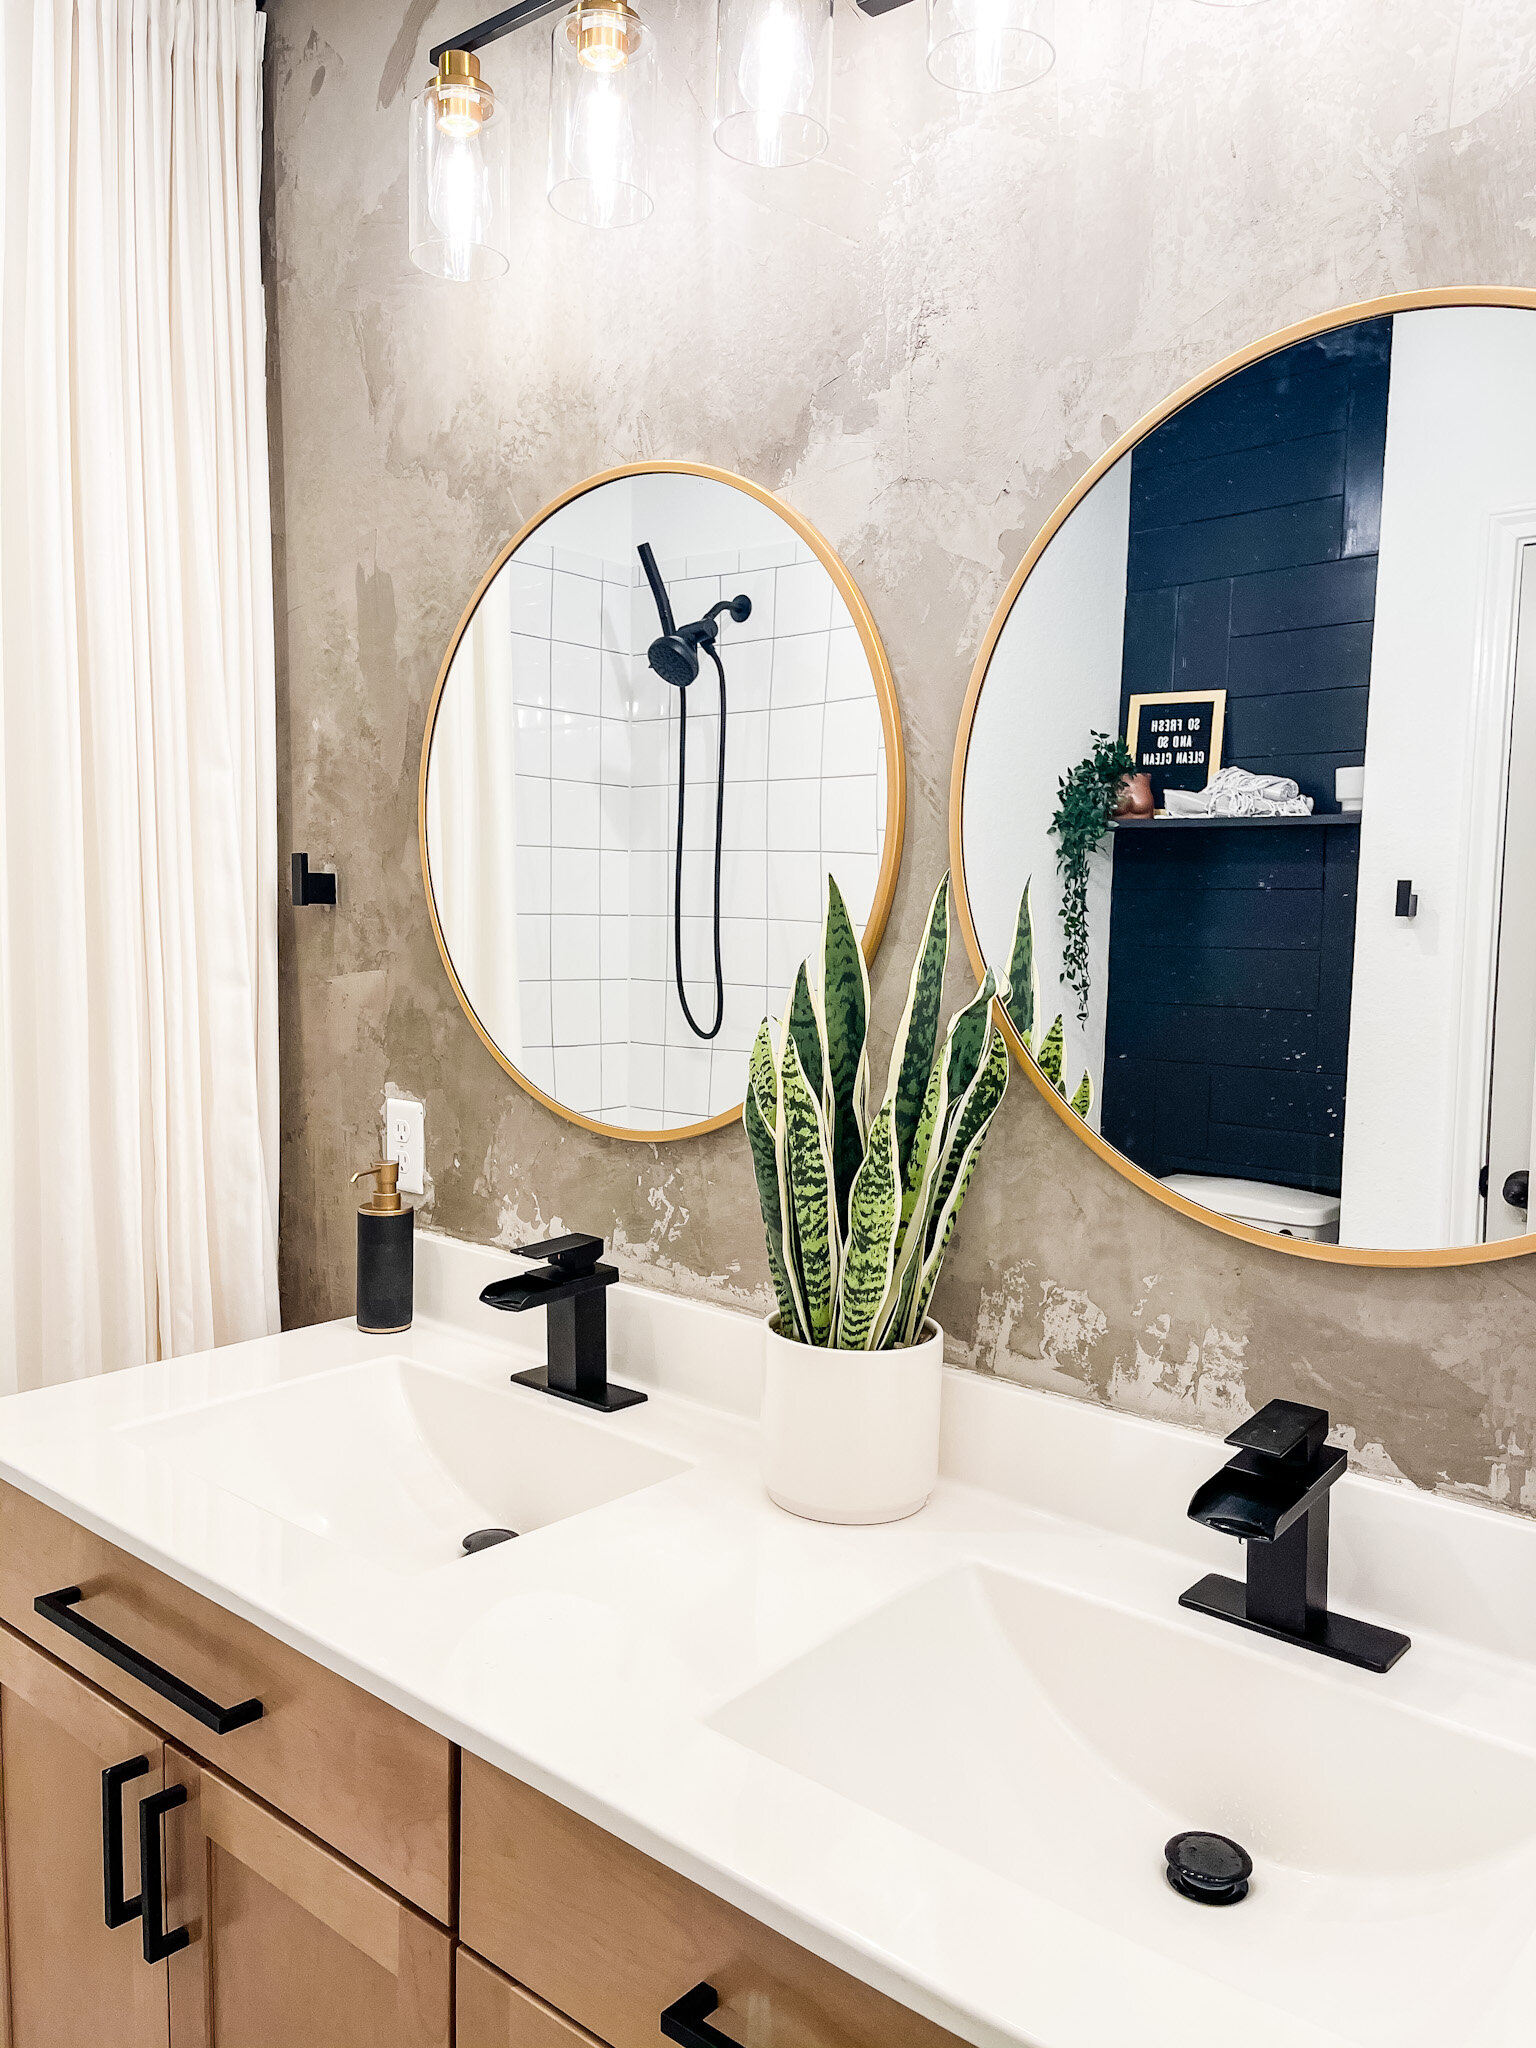
The cabinets. Those are one of my favorite design selections that we made. I love the natural wood look. It’s so organic and the matte finish is just *chef’s kiss*.
Double sinks. I had to convince Ira of this one. Clearly, he didn’t grow up sharing a single sink with a sibling. The single sink in my sister & I’s small bathroom growing up was the catalyst of a lot of 6am fights as we got ready for school. No way I was putting my future children through that haha.
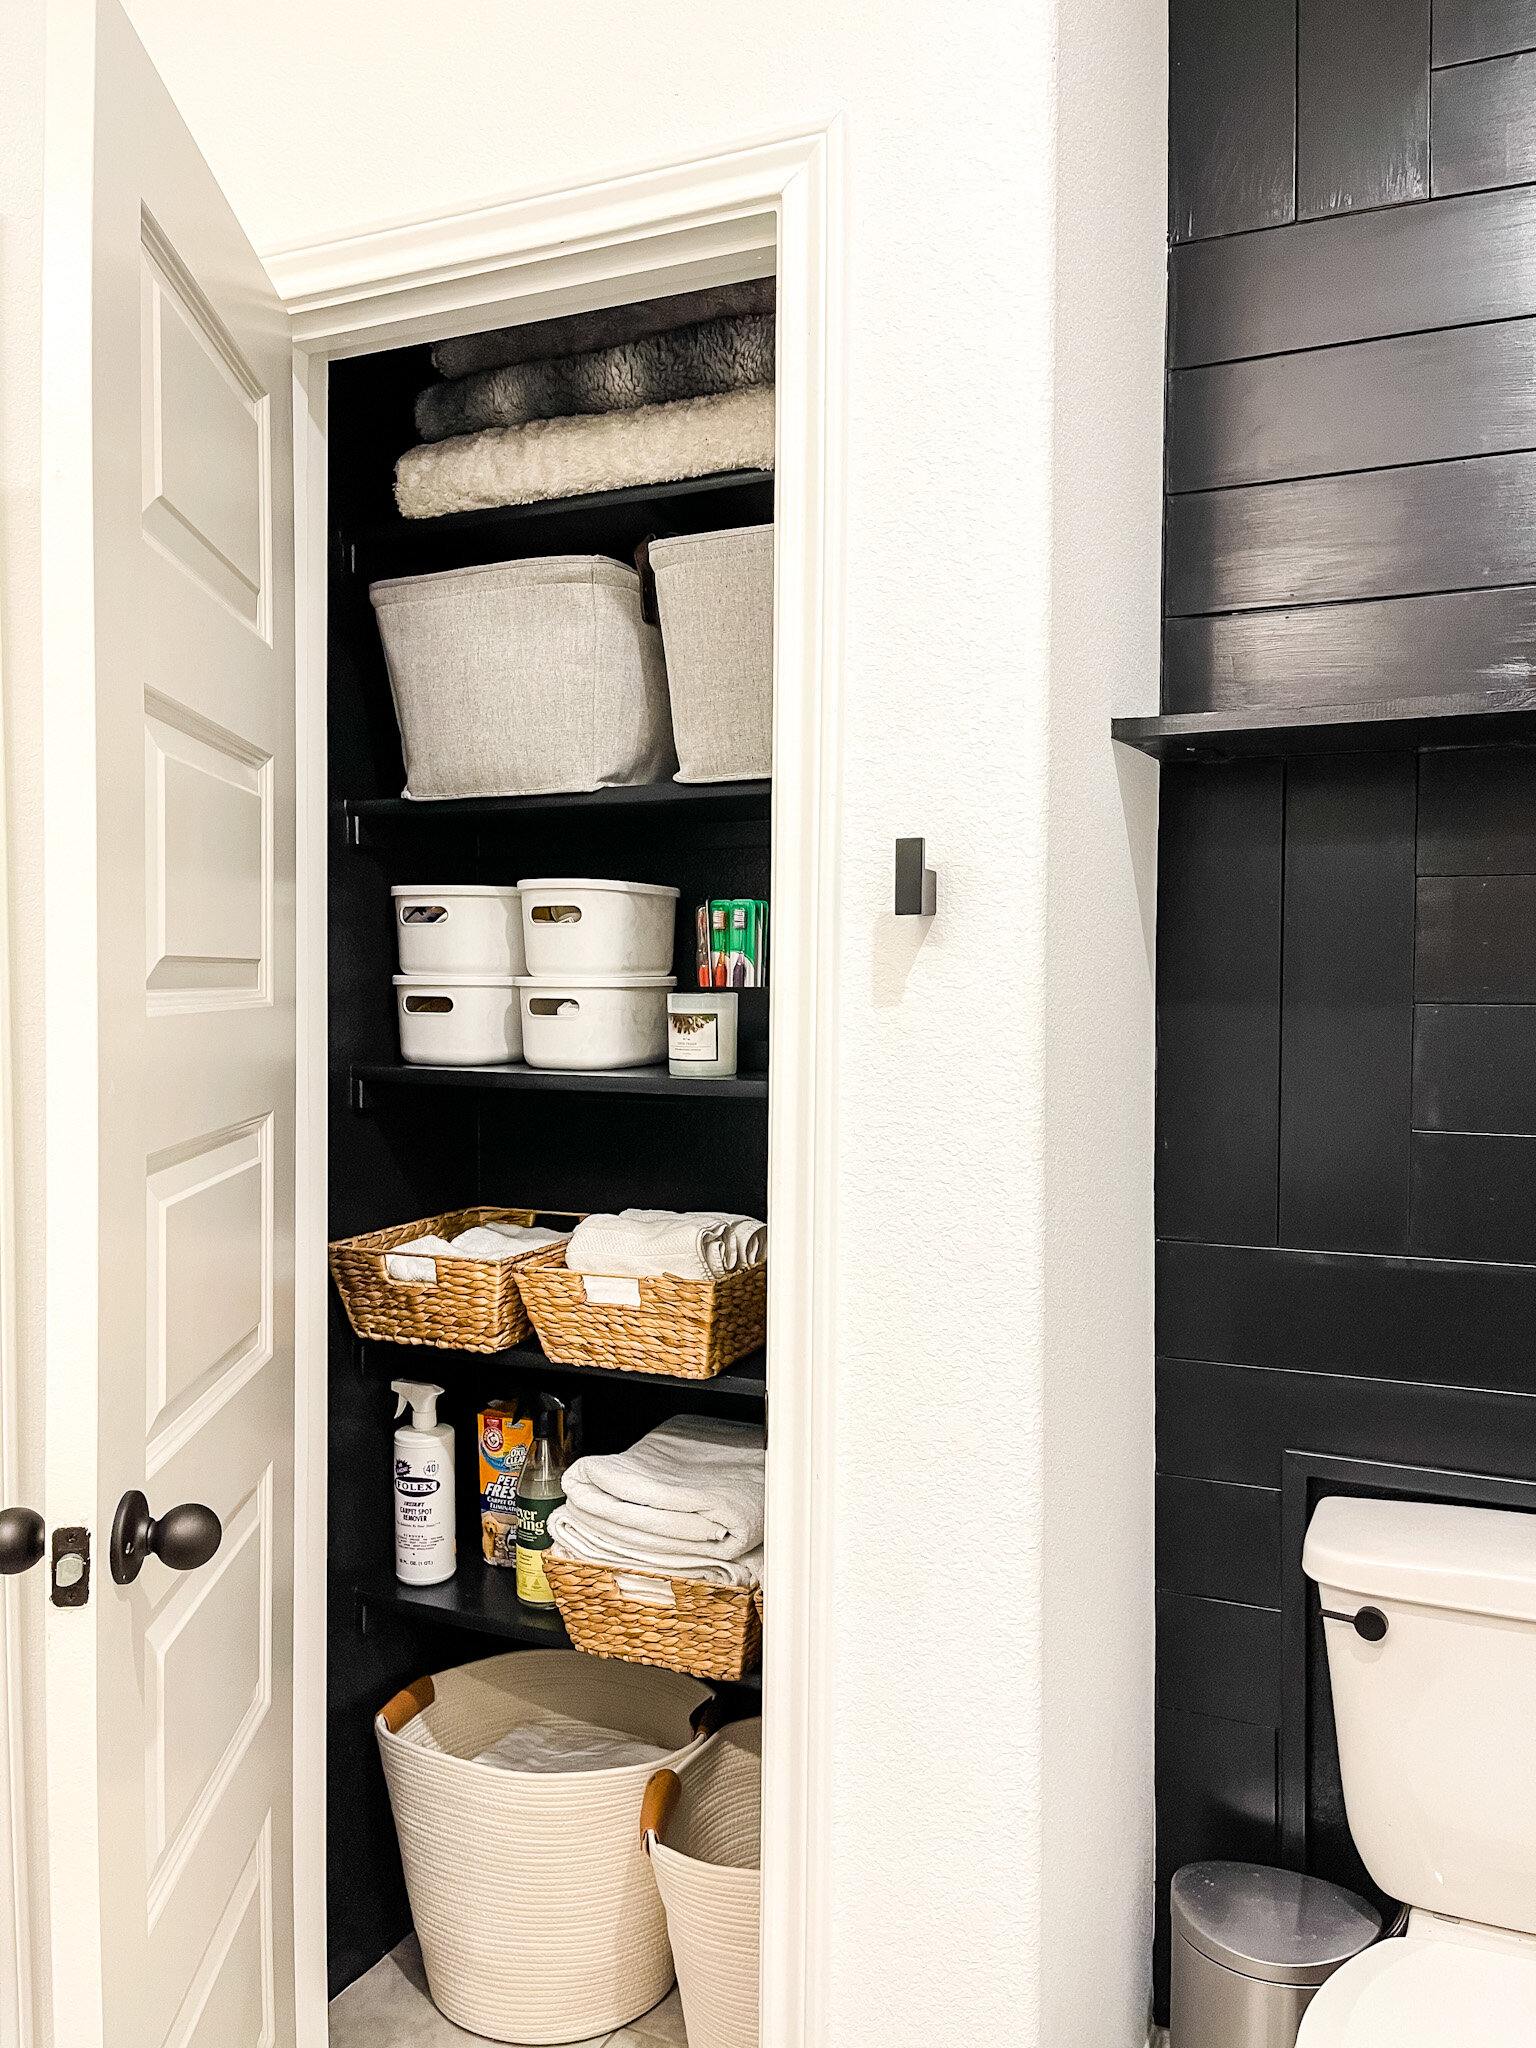
Storage! Ample vanity storage space plus a linen closet is pretty hard to come by in new builds.
Loathe List:
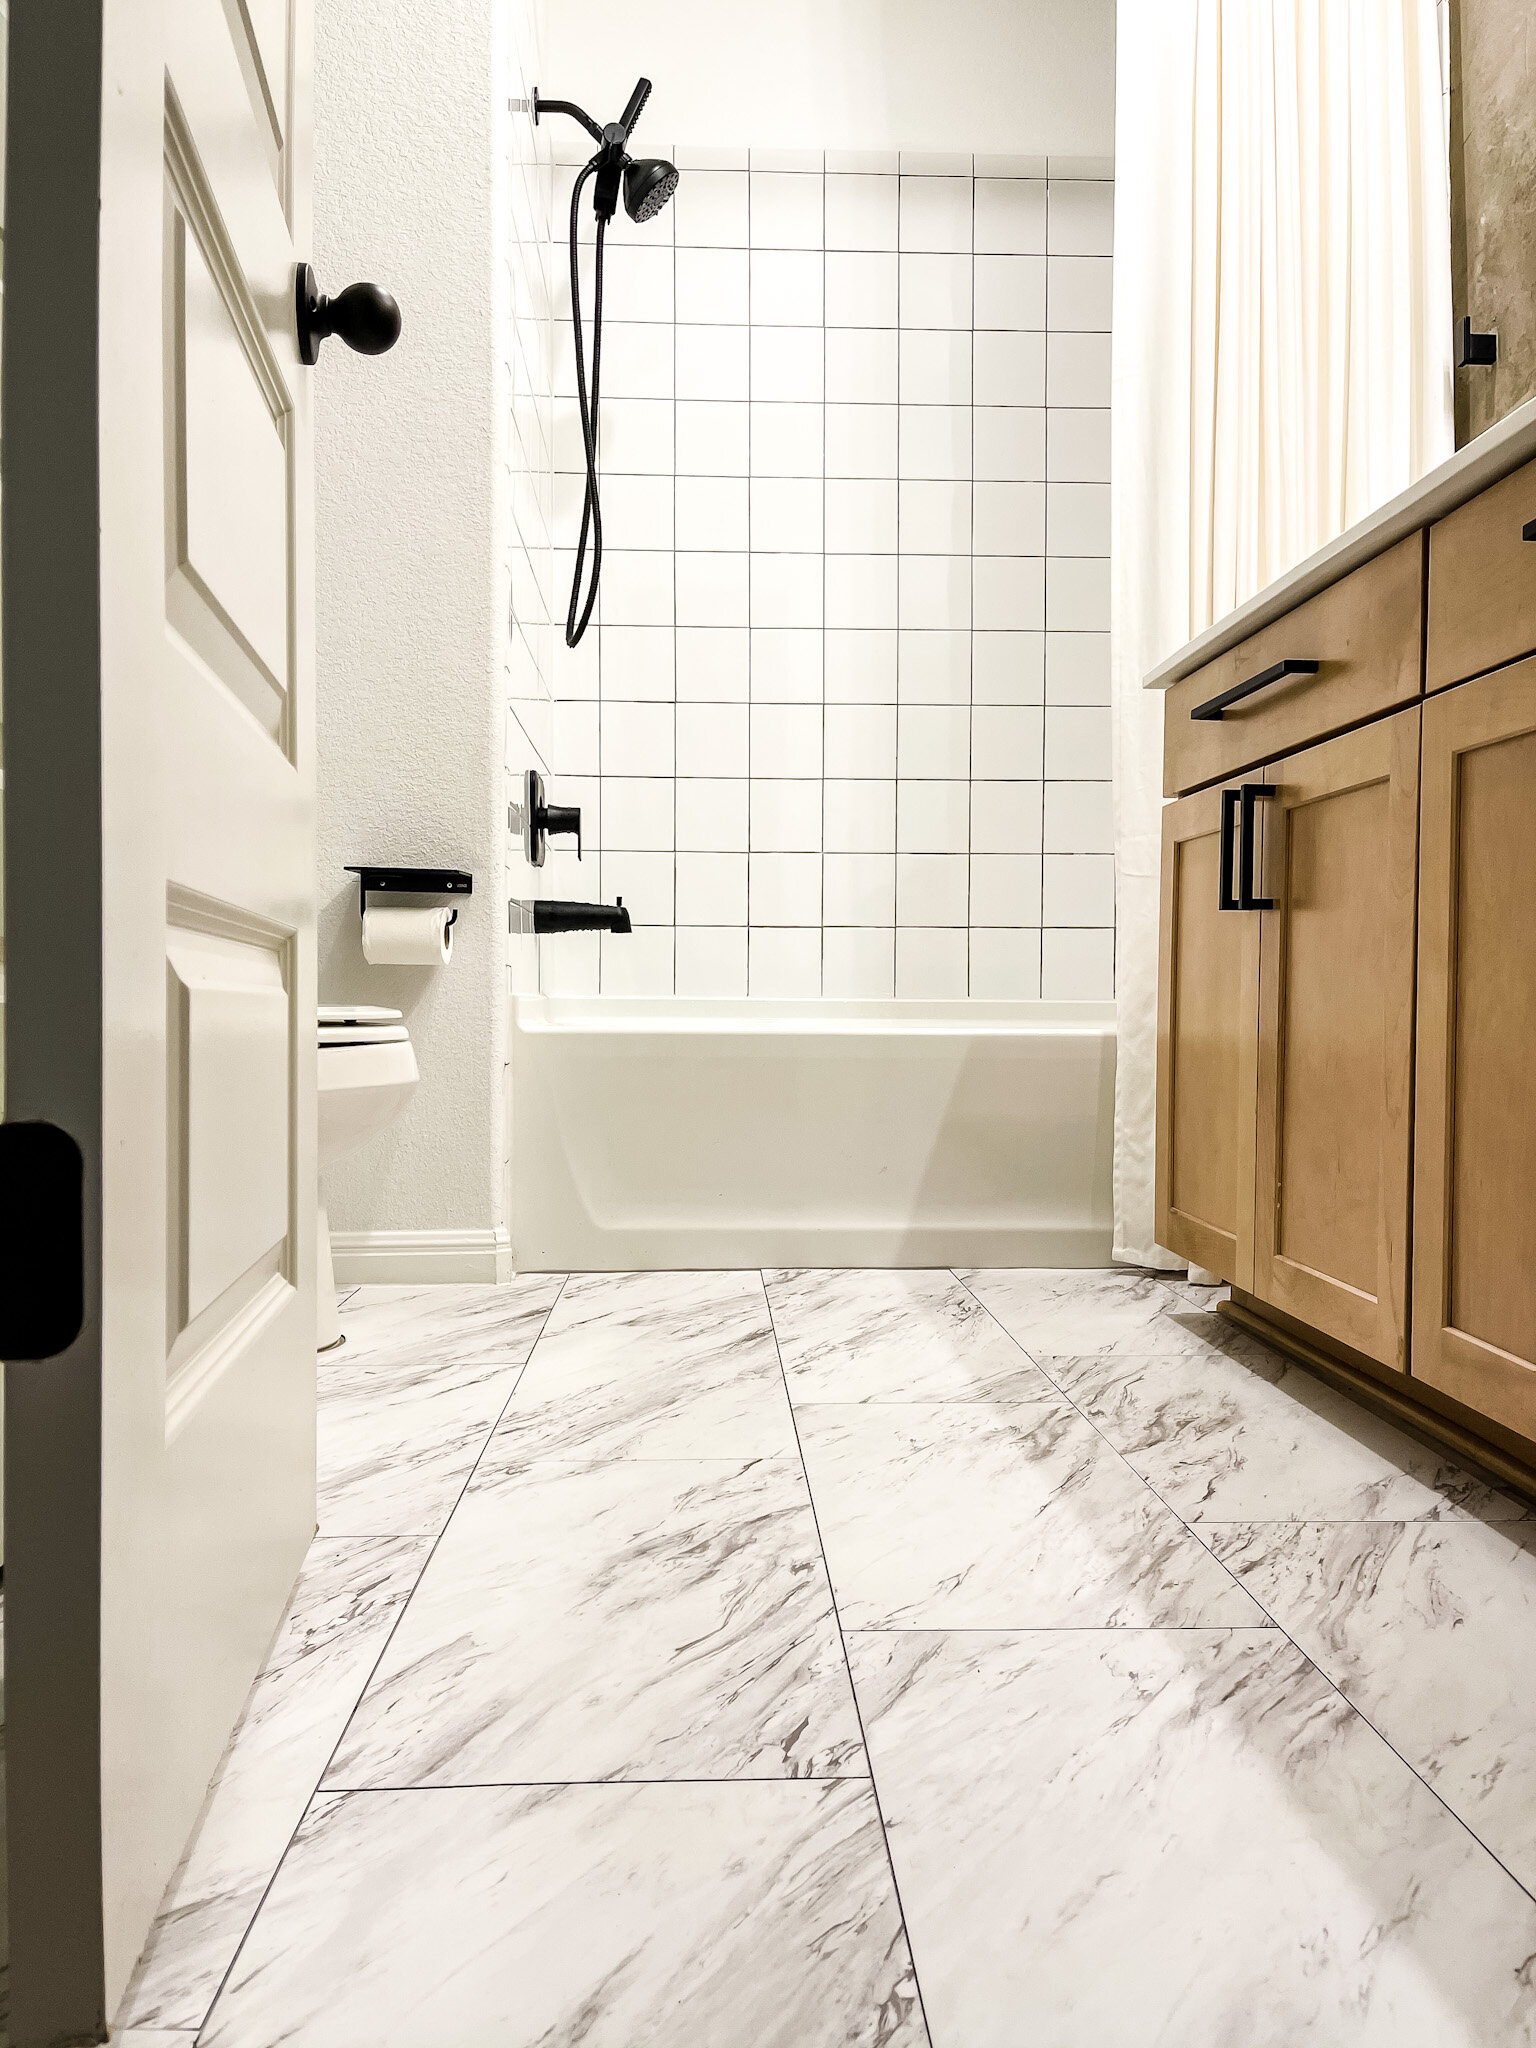
The floor tile. I like a room to give drama and interest, not basic and builder-grade.
Cabinet hardware...aka there wasn’t any!
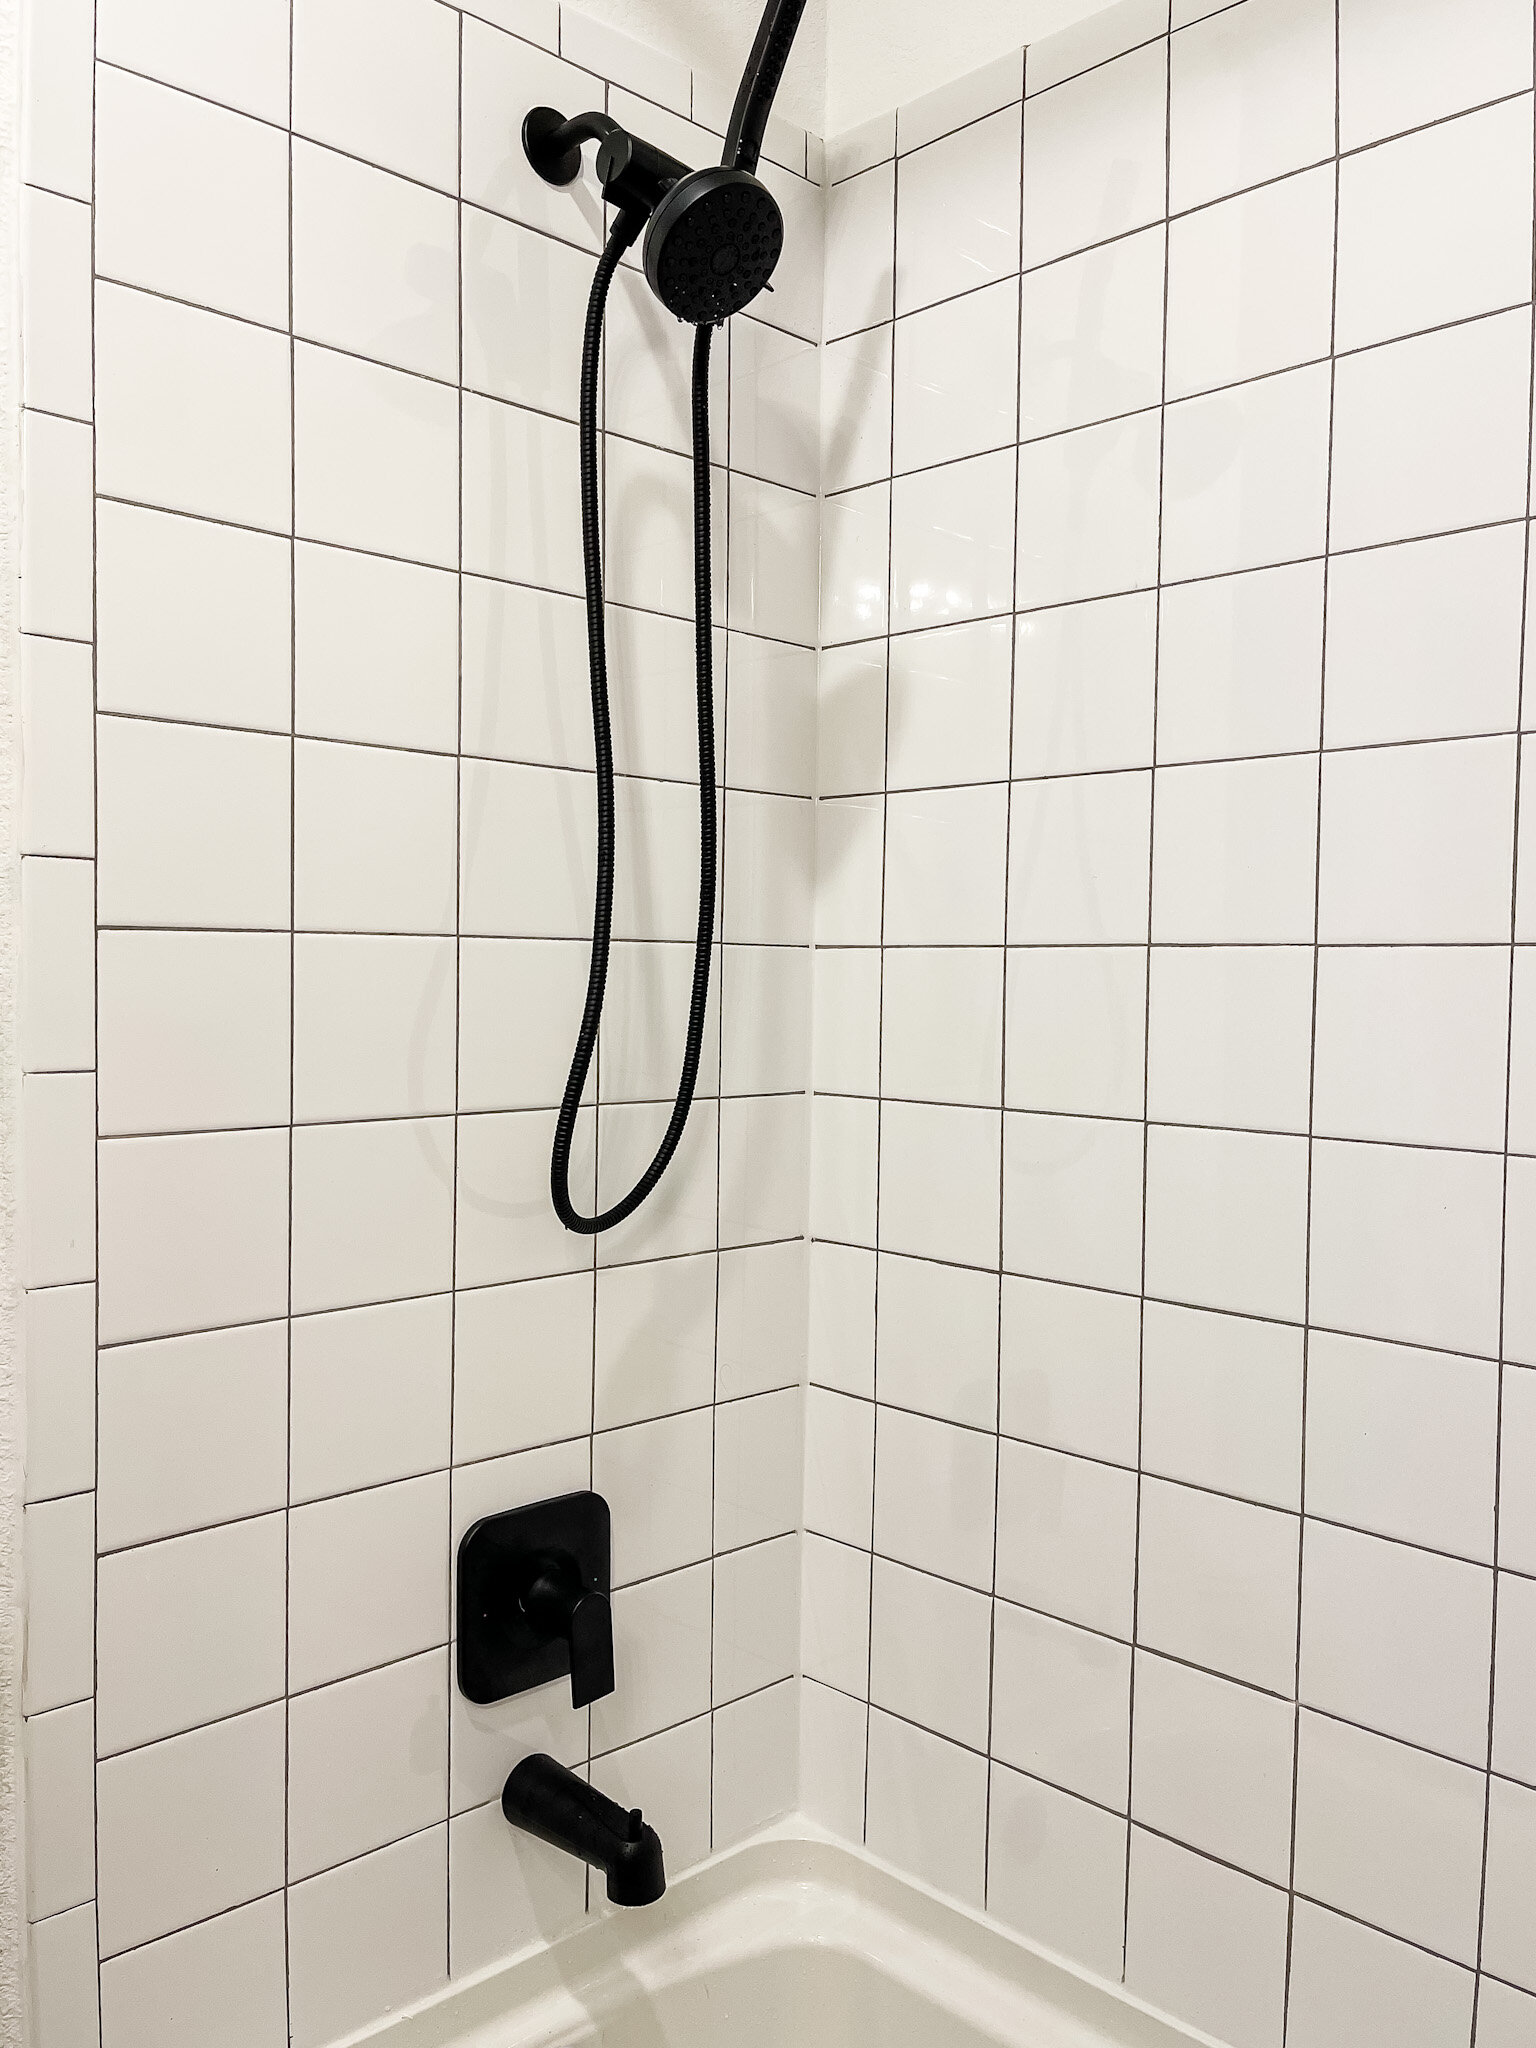
The tub/shower. I will admit the shower tile is better than the standard option, which was a plastic tub wall. But since we didn’t have enough money to upgrade to subway tile, I opted for plain white squares with white grout thinking it would just look simple and seamless. Rookie mistake! Even though we sealed it, the grout was already starting to turn colors after only 5 months.
Plumbing fixtures. This one was huge for me. I am just NOT a fan of chrome. I make no apologies for it. In certain applications (read: luxury homes) it looks great! In your everyday, cookie-cutter home with cheap builder fixtures...not so much.
Countertop. Ahhh, the good ‘ole cultured “marble” countertop. I really wish we could’ve swapped this out and maybe one day we still will! The thin slab and integrated sink just screams 80’s to me. Plus we’ve noticed that the shape of the sink actually makes it super hard to keep clean. BUT, it’s not the worst countertop ever and this is *only* a guest bathroom after all. So the countertop stays...for now.
SO, how’d I do it?! How’d I turn our guest bathroom into a guest restroom--complete with spa vibes, an oasis feel, and modern touches? Easy. $1000, a few weekends of work, and a wild idea that told me to smear concrete onto a perfectly good wall.
Use the links below to watch the whole transformation process unfold on my InstaGram stories!
How To Install A New Light Switch
Mini Shiplap Basket Weave Accent Wall
Guest Bathroom Makeover - Part 1 & Part 2
(Watch as I hang new vanity mirrors, create a concrete accent wall, stain my shower grout, install peel & stick floor tiles, install new light fixtures, paint the linen closet black, + more!)
How To Replace A Bathroom Faucet
How To Install A Vanity Light Fixture (Goodbye Hollywood Bulbs!)
and my #1 Homebuilding Hack---Why You Shouldn’t Upgrade Your Plumbing Fixtures Through Your Builder & How To Do It Yourself!
Plus, finally, the whole reason you’re here...The Budget Breakdown!
*These links are affiliate links, meaning that I may get a small commission from your purchase (at no extra cost to you!) Using affiliate links helps me continue to create great content here and on Instagram, so THANK YOU for supporting Kayla Simone Home!*

Ceiling Light Fixture | Vanity Light Fixture | Peel & Stick Tiles |Grout | Mirrors | Grout Sealer | Concrete | Black Paint | Rope Baskets |Gray Baskets | Faux Snake Plant | Lil’ Booty Vase | Letter Board | Hand Towels | Hand Towel Holder | Soap Dispenser | Cabinet Pulls - Long & Short | Shower Head | Shower Control & Tub Spout | Tub Trim | Shower Curtain | Shower Curtain Liner | Shower Curtain Rod | Wall Hanging | Light Switch | Toilet Handle | Toilet Paper Holder |Towel Hooks | Trash Can
Total Spend: $1187
Yes, it is still a pretty good chunk of cash to spend on a guest bathroom, but when you consider that the average bathroom remodel costs upwards of 10 bands (that’s $10,000 for all you Surbanities like me who would’ve otherwise had to google how much money that is)...a stack ain’t all that bad.
*I didn’t include the cost to upgrade the cabinets through our builder in my makeover cost, but in case you were wondering, it was $520. You can also buy our exact cabinets in the image above*
AND, because it’s always fun to see how much money you saved, here’s the breakdown of what our builder would’ve charged us for a *similar* upgrades…
Matte Black Moen Genta Plumbing Fixtures: $1350
Upgraded 12x12 Floor Tile: $200
Framed Mirror: $370
Upgraded Vanity Lights: $2170 (this price is for the whole house since the lighting package upgrade option is an all-or-none deal)
Total Cost through our Builder: $4,090…and that still doesn’t even include the painted closet, shiplap wall, concrete accent wall, or decor items.

And now that I step back and look at it, this Phase 1 makeover might just be the Forever Phase. It’s THAT good.